home renovation ideas on a budget

Home Renovation Ideas on a Budget That Actually Work

Every homeowner hits the same wall eventually: you love your house, but the kitchen feels dated, the bathroom grout is embarrassing, and the front porch has seen better days. Then you get a few quotes and your stomach drops. Here’s the good news — good home renovation ideas on a budget don’t require a second mortgage. They require knowing which projects give you the most visible change for the least money, and which ones you can safely do yourself on a weekend. We’ve spent years walking through homes around Covington and Slidell helping people figure out exactly that, and this guide is the same advice we’d give a neighbor.

Before you buy a single gallon of paint or swap out a faucet, it helps to think like a contractor for a minute. We don’t walk into a house and think ‘what can I sell this person.’ We think ‘what’s the cheapest fix that will make the biggest visual difference, and what’s actually broken versus just outdated.’ That distinction changes everything about how you spend your renovation dollars.

What to Look For When Choosing a Budget Renovation Project

Not every home renovation idea on a budget is created equal. Some projects cost almost nothing and completely change how a room feels. Others eat a weekend and a few hundred dollars and barely register. Here’s what separates the winners from the money pits.

High visibility, low cost. Anything at eye level or in a high-traffic area — hardware, lighting, paint, faucets — gives you outsized returns because people notice it every single day. A homeowner in Mandeville once told us she spent two years annoyed by her kitchen and then realized it was really just the cabinet hardware and a yellowed light fixture bothering her, not the cabinets themselves. Fifty dollars and an afternoon fixed what she thought was a five-thousand-dollar problem.

Reversible or low-risk. Budget renovations should rarely involve tearing into plumbing, electrical, or structural elements unless you know exactly what you’re doing. Paint, hardware, lighting fixtures, and surface-level updates are forgiving. If you mess up, you repaint or reinstall. Move a wall or reroute a drain line incorrectly, and you’re now paying a professional to fix your fix.

Tools you already have (or can justify buying). A big part of keeping a renovation budget-friendly is not renting or buying specialty equipment for a one-time job. If you’re going to be doing multiple projects around the house — and most budget renovators end up doing exactly that once they get the bug — it’s worth investing once in a solid set of tools rather than piecing things together project by project. A DEWALT 20V MAX Cordless Drill and Impact Driver Combo Kit (DCK240C2) style setup covers 90 percent of what a DIY renovator needs: hanging shelves, swapping hardware, assembling furniture, driving deck screws. If you’re starting from zero, this is the single best dollar-for-dollar purchase you can make before starting any budget renovation.
home renovation ideas on a budget

Home Renovation Ideas on a Budget, Room by Room

Let’s get specific. Below is how we’d prioritize spending if someone handed us a modest renovation budget and said ‘make this house feel new again.’

home renovation ideas on a budget

Kitchen: The Room With the Best Return

You don’t need new cabinets to transform a kitchen. In fact, full cabinet replacement is one of the worst dollar-for-visual-impact ratios in the whole house. Instead:

Paint or reface the cabinets you have. A cabinet color change — especially going from dated oak or honey-toned wood to a clean white, soft green, or navy — is one of the single biggest visual transformations available for under a few hundred dollars in paint and supplies. It takes patience (sanding, priming, multiple thin coats) but it’s genuinely a weekend-warrior project.

Swap the hardware. This sounds too simple to matter, but it’s not. New pulls and knobs in a modern finish — matte black, brushed brass, brushed nickel — change the entire personality of a kitchen for well under $150 in most cases.

Replace the faucet. A dated, spotted, or corroded faucet is one of the first things people notice, and modern pull-down faucets install in under an hour with basic tools.

Update the lighting. Swapping a builder-grade flush mount or dated pendant for something with real character is one of the cheapest ways to change how a whole kitchen feels at night, when most families actually spend time in there.

Backsplash tile, if you’re willing to learn. This is the one kitchen project on this list that requires real skill-building, but it’s absolutely within reach of a determined DIYer. A basic subway tile backsplash runs a few hundred dollars in materials and can be knocked out in a weekend if you’ve got the right tools. A wet saw makes a massive difference here — trying to score-and-snap your way through a full backsplash with a manual cutter is how projects turn into disasters. Something like the CHENYUCHAO 2300W Electric Tile Cutting System, 71\” Rail Guide, Wet/Dry gives you clean, consistent cuts around outlets and corners without chipping your tile.
home renovation ideas on a budget

Bathroom: Small Room, Big Impact

Bathrooms are deceptively cheap to refresh because they’re small — less square footage means less material and less labor time, even if you’re paying yourself in sweat equity.

Regrout and re-caulk. This is genuinely the highest-impact, lowest-cost bathroom fix that exists. Grimy, cracked, or mildewed grout makes an entire bathroom look dirty even when it’s spotless. A weekend of regrouting and fresh caulk around the tub can make a 20-year-old bathroom look freshly renovated.

Reglaze or replace the vanity. A dated vanity with a laminate top can either be swapped for an inexpensive prefab unit or given new life with paint and a new countertop. This is one of the more approachable carpentry-adjacent projects for a beginner.

New mirror and light fixture. Builder-grade bathrooms almost always have a plain rectangular mirror and a strip of bulbs. A framed mirror and a modern vanity light fixture cost relatively little and change the whole feel of the room.

Toilet and faucet updates. These are mechanically simple swaps that most homeowners can handle with basic tools and an hour or two of patience — just make sure your water supply lines are in good shape before you start, since old, brittle lines are the actual cause of most bathroom leaks, not the fixtures themselves.
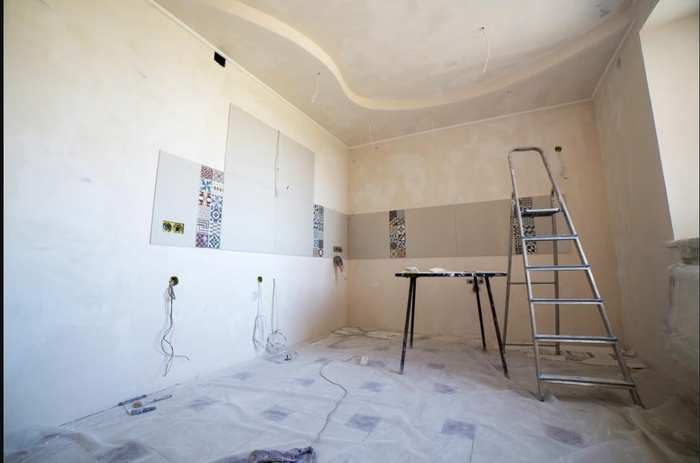
home renovation ideas on a budget

Paint: Still the Best Dollar-for-Dollar Renovation

If you take away one thing from this guide, let it be this: paint remains the single best value in all of home renovation. Whole-house interior paint refreshes, accent walls, cabinet painting, exterior trim touch-ups, front door color changes — all of it delivers a disproportionate return relative to material cost. The main expense is your time and a little bit of prep work (sanding, patching, taping). If you’ve never tackled a full room before, resources like This Old House’s painting guides walk through prep and technique in more detail than we have room for here, and they’re worth a read before you start, especially if you’re dealing with older trim or plaster walls that may need extra prep.

One caveat worth taking seriously: if your home was built before 1978, don’t skip checking for lead paint before you start sanding or scraping. The EPA’s lead-safe renovation guidance lays out simple testing steps and safe work practices, and it’s a five-minute read that can prevent a serious health issue, especially if you’ve got young kids in the house.
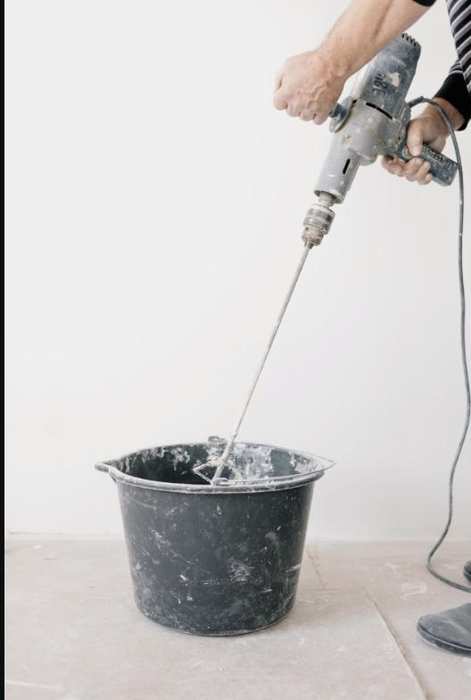
home renovation ideas on a budget

Lighting and Hardware: The Cheapest Transformation in the Book

We already touched on this room by room, but it deserves its own mention because it’s one of the most underrated home renovation ideas on a budget across the entire house. Swapping out dated ceiling fixtures, cabinet pulls, door hinges, and switch plates is inexpensive, fast, and dramatically changes how ‘updated’ a home feels. Most of these projects require nothing more than a screwdriver and, for light fixtures, a basic understanding of how to safely cut power at the breaker before you start. If you’re not confident around a junction box, this is one of the few spots on this list where it’s worth pausing and asking whether it’s a job to hand off.

home renovation ideas on a budget

Curb Appeal: Cheap Wins Outside the House

The exterior of your home is the first thing anyone sees, and it’s also one of the most forgiving places to do budget renovation work.

Pressure wash everything. Siding, the driveway, the front walk, the porch — years of Louisiana humidity leave mildew and grime on every exterior surface, and a good pressure washing often makes a house look like it just got painted, for the cost of a rental or, if you’re going to use it more than once, an investment like the SIMPSON Cleaning PS3228 PowerShot 3300 PSI Gas Pressure Washer, Honda GX200. In our humid climate, this is honestly one of the highest-value maintenance tasks a homeowner can do, budget renovation or not.

Paint the front door. A bold, well-chosen front door color is one of the cheapest, highest-impact curb appeal moves available. It takes a can of paint and an afternoon.

Refresh the landscaping and mulch. Trimming overgrown shrubs, edging beds, and laying fresh mulch costs relatively little and instantly makes a home look cared for.

House numbers and mailbox. Small, cheap, and easy to overlook — but dated or mismatched house numbers are one of those details that quietly age a home.

Flooring: Where to Spend and Where to Skip

Full flooring replacement is rarely a true budget project, but there are exceptions worth knowing. Refinishing existing hardwood, rather than replacing it, is often dramatically cheaper and gives you a like-new floor. Laminate and luxury vinyl plank click-lock flooring have also gotten genuinely good and are within reach for a determined DIYer with basic tools, a straightedge, and patience — just budget extra time for acclimating the material to your home’s humidity before installation, which matters more here on the Northshore than it does in drier climates.

Getting the Right Tools Without Overspending

A lot of budget renovations stall out not because the project is too hard, but because the homeowner doesn’t have the right tool for the job and either buys the wrong thing or gives up. If you’re planning to tackle several of the projects above over the course of a year, it’s worth investing in a decent set of tools up front rather than buying cheap one-off items as you go. A well-rounded kit like the RYOBI P1819 18V ONE+ 6-Tool Combo Kit covers drilling, driving, cutting, and sawing needs across most beginner-to-intermediate projects, and the batteries are interchangeable across the whole RYOBI ONE+ line, so you’re not buying a new battery system every time you add a tool. If you know you’ll eventually be doing heavier work — deck repairs, framing small projects, cutting lumber for shelving — a step up to something like the DEWALT 20V MAX XR 3-Tool Brushless Combo Kit (DCK360D3) will serve you for years.

Our Honest, Opinionated Take

If we had to rank the best home renovation ideas on a budget by pure return on investment, it would look like this: paint first, hardware and lighting second, bathroom regrouting third, kitchen backsplash fourth, exterior pressure washing and curb appeal fifth. Full remodels of any kind — kitchen or bath — rarely belong in a true ‘budget’ conversation, because even a modest one quickly climbs into the tens of thousands once plumbing, electrical, and cabinetry get involved. The real magic of budget renovation is knowing that most of what makes a home feel ‘renovated’ is actually surface-level: color, hardware, cleanliness, and light. You can chase 80 percent of the visual impact of a full remodel for maybe 15 percent of the cost if you focus on those categories instead of structural change.

For homeowners who want a data-backed gut check on which renovations actually hold their value, Remodeling Magazine’s annual Cost vs. Value report breaks down average return on investment by project type and region, and it consistently backs up what we see in the field: smaller, cosmetic updates return more per dollar spent than large-scale remodels.

That said, some projects genuinely aren’t DIY-friendly no matter how tight the budget, and it’s worth being honest with yourself about which ones those are. Anything involving load-bearing walls, gas lines, main electrical panels, or roof structure should go to a licensed professional every time — not because you’re incapable, but because the cost of a mistake there isn’t measured in wasted paint, it’s measured in safety and in your home’s value. If you’re weighing a project and you’re not sure which category it falls into, it’s worth a quick conversation before you start tearing into anything. We’re always happy to talk through a project honestly, even if the answer is ‘yeah, you can absolutely do that yourself.’

Bringing It All Together

The best home renovation ideas on a budget aren’t about doing less — they’re about spending smarter. Prioritize the changes that touch what you see and touch every day: paint, hardware, lighting, grout, and curb appeal. Save the big structural money for the projects that actually need it. And if you get partway into a project and realize it’s bigger than you expected, or you just don’t have the weekend to spare, that’s what we’re here for — you can always get a free quote from our team and we’ll tell you honestly whether it’s a two-hour fix or something worth handing off. Either way, you’ll walk away with a home that finally feels the way you always pictured it, without the budget blowing up along the way. If you want to see the kind of work we handle when a project does need a professional touch, our full list of home improvement services covers everything from kitchens and baths to exterior repairs across Covington and Slidell. And if you’re just starting your renovation journey, our step-by-step guide to painting a room like a pro is a great next stop before you pick up a brush.
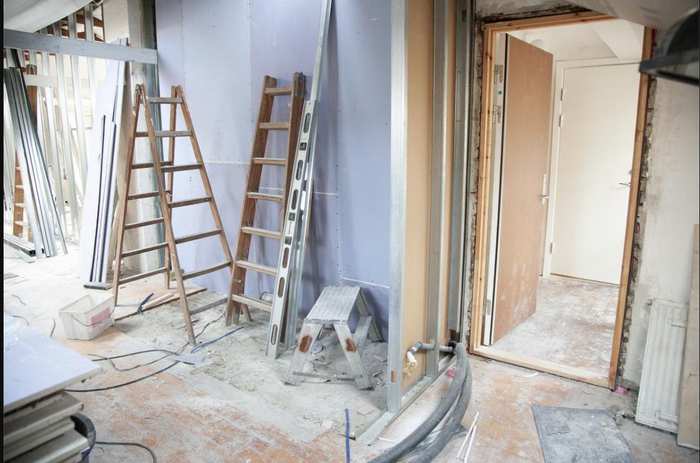
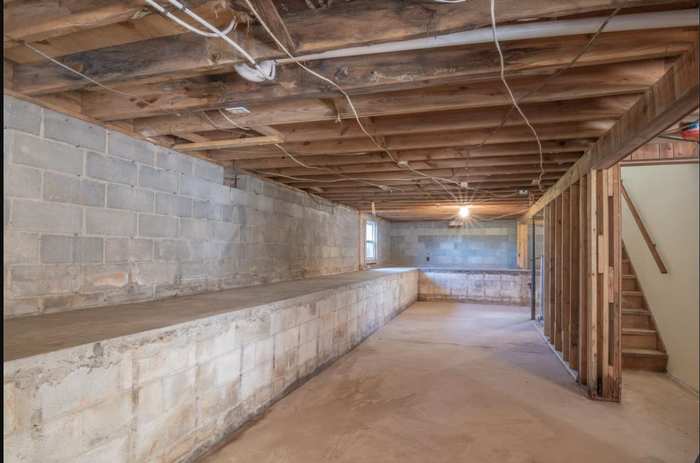
crawl space renovation ideas

Crawl Space Renovation Ideas That Actually Add Value

If you’ve spent any time under your house in south Louisiana, you already know the drill: musty air, damp dirt or crumbling old plastic sheeting, maybe a little standing water after a hard rain. Before you start dreaming up crawl space renovation ideas that make the space more useful, it helps to know which upgrades actually matter here on the north shore versus what works in a drier climate. Our humidity, high water table, and hurricane season change the whole equation. This guide walks through what to prioritize, what’s worth the money, and where a project like this can go sideways if you skip a step.

We say this a lot, but it bears repeating up front: a crawl space in Covington or Slidell is not the same animal as a crawl space in Colorado or Ohio. Ours sits closer to the water table, deals with more rainfall, and spends most of the year in near-constant humidity. That means the crawl space renovation ideas that work great in a Pinterest photo from a dry climate can actually cause problems here if you copy them without adjusting for our conditions. Keep that in mind as you read through each idea below — we’ve tried to flag where the local climate changes the calculus.

What to Look For Before You Try Any Crawl Space Renovation Ideas

Every good crawl space renovation idea starts with the same question: is the space dry and structurally sound? It doesn’t matter how nice your new storage shelving or vapor barrier looks if moisture is still working its way in through the soil, foundation vents, or a cracked pier. In our climate, that’s rarely a maybe — it’s almost always happening to some degree. So before you shop for materials or plan out a layout, walk your crawl space with a flashlight and check for:

– Standing water or damp soil, especially near the low corners
– Wood rot or soft spots on joists and sill plates
– Visible mold, mildew, or that unmistakable musty smell upstairs
– Sagging or torn vapor barrier (or none at all)
– Rusted metal fasteners or ductwork, a sign of chronic humidity
– Gaps around pipe penetrations, vents, or the crawl space door

Take your time on this walkthrough — it’s genuinely the most important hour you’ll spend on the whole project. Bring a notepad or your phone and photograph anything that concerns you, section by section, so you’re not relying on memory later when you’re deciding what to fix first. It also helps to check after a heavy rain rather than during a dry stretch, since a lot of moisture issues only show themselves when the ground is saturated. If you find active water intrusion or rot in the framing, that needs to be solved first — no renovation idea is worth building on top of a moisture problem. The EPA has a solid, practical guide to mold, moisture, and your home that’s worth a read before you buy a single piece of material, since a lot of these fixes overlap with mold prevention.

crawl space renovation ideas

Idea #1: Full Encapsulation (The Foundation of Everything Else)

Encapsulation means sealing the crawl space off from outside air and ground moisture with a heavy-duty vapor barrier (typically 10-20 mil poly sheeting) that covers the soil and runs up the foundation walls, combined with sealed vents and sometimes conditioned air. For homes in Covington and Slidell, this is usually the single most valuable upgrade you can make, full stop. It protects your subfloor, your ductwork, your indoor air quality, and it’s the prerequisite for basically every other crawl space renovation idea on this list.

The actual process breaks down into a handful of stages: clearing out old debris and any existing torn plastic, addressing any active moisture sources (grading, gutters, or a French drain if water is actively pooling), laying and seaming the vapor barrier so it overlaps properly at every seam, taping it, running it up the foundation walls a few inches, and sealing foundation vents so outside humid air can’t undo all that work. Some homeowners stop there; others add a dedicated supply of conditioned air from the HVAC system, which is a bigger step and usually worth having an HVAC contractor weigh in on.

DIY encapsulation is doable for a motivated homeowner with a free weekend (or two), but it’s physically miserable work — you’re on your belly in tight, dusty spaces taping seams and stapling barrier material, often in July heat that makes an already claustrophobic job feel worse. Wear a respirator rated for dust and mold spores, not just a paper mask, and bring a headlamp so both hands stay free. A drill/driver combo makes fastening trim boards and vent covers much faster than doing it by hand; something like the DEWALT 20V MAX Cordless Drill and Impact Driver Combo Kit handles both the drilling and driving you’ll need without swapping tools mid-crawl. Budget more time than you think — most first-timers underestimate how long seam-taping alone takes, especially around pipes, ductwork, and support piers that break up an otherwise simple rectangle of floor space.

crawl space renovation ideas

Idea #2: A Dedicated Crawl Space Dehumidifier

Once the space is sealed, humidity has nowhere to escape unless you actively manage it. This is the step people skip and then wonder why their encapsulation “didn’t work.” A crawl space needs its own dehumidifier sized for the square footage — not a little portable unit meant for a bedroom. The ALORAIR Galaxy 60 Crawl Space Dehumidifier 145 PPD, Up to 1,800 Sq. Ft. is built specifically for this kind of low-clearance, high-moisture environment, with automatic drainage so you’re not hauling a bucket out every few days. In our climate, running one of these year-round isn’t overkill — it’s basically mandatory if you want the space to stay dry.

When you’re sizing and placing the unit, think about airflow the same way you would for a room upstairs. Set it up near the center of the space if possible, away from the direct path of the sump pump discharge line, and route the condensate drain to daylight or into an existing drain line rather than letting it pool nearby. Most units have a humidistat you can set and mostly forget — aim to keep relative humidity in the 50-55% range, which is low enough to stop mold and wood rot without drying out framing unnecessarily. Check the filter every couple of months; in a dusty, freshly renovated crawl space, it’ll clog faster than the manual suggests.

Worth noting: during hurricane season, power outages are common, and a dehumidifier that shuts off for three days during a tropical storm can undo weeks of progress, especially if that outage coincides with heavy rain and a saturated water table pushing moisture toward your foundation. A backup power source like the Generac 8011 GP7500E 7,500-Watt Dual-Fuel Portable Generator can keep a dehumidifier (and a sump pump, if you have one) running through an outage, which matters more here than in almost any other part of the country. It’s the kind of purchase that feels like overkill until the one August you’re glad you have it.

crawl space renovation ideas

Idea #3: Smarter Insulation for Our Climate

Traditional fiberglass batts stapled between the joists are a common sight in older homes, but they’re actually one of the worst options for humid climates — they trap moisture against the wood and become a breeding ground for mold, and they tend to sag and fall over time as the paper facing degrades. If you’re updating insulation as part of your crawl space renovation ideas, rigid foam board against the foundation walls (paired with encapsulation) performs far better than batts against the subfloor. It’s a bigger shift in approach than most homeowners expect, but it’s the difference between insulation that lasts and insulation you’re replacing again in five years.

The logic here is worth understanding, not just following blindly: once you’ve encapsulated and conditioned the crawl space air, you’re treating the space more like a sealed basement than a vented attic. Insulating the perimeter walls instead of the subfloor keeps the whole crawl space — including your ductwork and any plumbing down there — inside the home’s conditioned envelope. That’s a meaningfully different approach than what a lot of national how-to articles recommend, because most of them are written for climates where vented crawl spaces still make sense. Ours generally don’t.

crawl space renovation ideas

Idea #4: Smart, Off-the-Ground Storage

Once the space is dry and sealed, a crawl space can genuinely earn its keep as storage — holiday decorations, off-season gear, extra building materials. The key rule: nothing touches the vapor barrier or sits directly on the ground, even a sealed one. Freestanding wire shelving units or wall-mounted brackets keep bins up off the floor and away from any residual dampness. Stick to plastic totes rather than cardboard boxes, since cardboard wicks moisture even in a well-controlled space.

A few extra habits go a long way here too. Label totes clearly and keep a simple inventory list taped inside the access door, since crawl space storage tends to become out-of-sight, out-of-mind otherwise. Avoid storing anything you’d be genuinely upset to lose — even a well-encapsulated crawl space is still more exposed to temperature swings, pests, and the occasional plumbing leak than an interior closet. Think seasonal decorations and bulky, replaceable items rather than family photos or important documents.

crawl space renovation ideas

Idea #5: Lighting and Easier Access

If you’re going to be down there regularly — checking the dehumidifier, grabbing storage bins, doing seasonal HVAC maintenance — a couple of battery-powered or hardwired LED puck lights and a properly sized access door make a bigger quality-of-life difference than people expect. A wider, insulated crawl space door also helps keep conditioned air where it belongs if you’ve gone the encapsulation route. This is a nice weekend add-on once the bigger structural and moisture work is done.

If you’re running any wiring down there for lighting, treat it with the same caution you would in a damp basement — use fixtures and connectors rated for damp locations, and if you’re not fully comfortable running low-voltage wiring yourself, this is an easy task to hand off to an electrician for an hour rather than risk a bad connection in a space you’ll rarely be checking on. The Consumer Product Safety Commission and most local codes are strict about damp-location fixtures for good reason.

crawl space renovation ideas

Idea #6: Reinforcing Framing and Support Piers

While you’re already under there, it’s worth inspecting and, if needed, sistering (reinforcing) any joists that show early signs of sagging or rot, and checking that support piers are level and properly shimmed. This isn’t the most exciting item on a list of crawl space renovation ideas, but catching a minor structural issue now is a lot cheaper than dealing with a sagging floor upstairs later. A full-size tool combo kit like the CRAFTSMAN V20 7-Tool Combo Kit (CMCK700D2) covers the drilling, cutting, and fastening you’d need for this kind of framing work without buying tools piecemeal.

When you’re checking piers, bring a 4-foot level and a flashlight, and look for gaps between the pier cap and the beam it’s supporting — even a small gap means the pier isn’t doing its job and the load is shifting elsewhere. Minor shimming with hardwood shims or pressure-treated cedar shingles is a reasonable DIY fix. If you’re seeing piers that have visibly sunk, tilted, or cracked, or joists with rot beyond surface staining, that’s a sign the issue has been developing for a while and it’s worth having someone experienced confirm the scope before you sister anything yourself.

What Doesn’t Make Sense Here: Turning It Into Living Space

You’ll see plenty of crawl space renovation ideas online about converting the space into a mini rec room or extra storage “basement.” In most of Covington and Slidell, that’s not realistic — our crawl spaces are typically 18 to 36 inches of clearance, built that way specifically because of our high water table and flood risk. Digging out a crawl space to create headroom, the way people do up north to build basements, isn’t something to take on as a DIY project; it involves foundation engineering, drainage, and permitting that’s well outside weekend-project territory. If you’re set on more usable square footage, that conversation is better had with a contractor who can evaluate your specific foundation and site — our team can walk you through what’s realistic during a free quote if you want an honest read on it.

Our Honest Take

If we’re being straight with you: encapsulation plus a proper dehumidifier is the crawl space renovation idea that matters most in this region, and it’s not close. Everything else on this list — storage, lighting, insulation upgrades — only holds up long-term once moisture is under control. We’ve seen too many homeowners spend money on nice shelving or fresh insulation only to have it ruined within a year because the underlying humidity problem was never addressed. Start there, and everything else becomes a much easier, more satisfying project. For more on the sealing process itself, the step-by-step guide to encapsulating your crawl space on our blog covers the materials and technique in more detail, and Family Handyman’s overview of crawl space moisture control is a good second opinion on the approach.

If you’re trying to prioritize on a budget, tackle it in this order: fix any active water intrusion first, then encapsulate, then add the dehumidifier, then move on to insulation, storage, and lighting as time and money allow. Doing it in reverse — buying nice shelving before the moisture problem is solved, for instance — is the single most common mistake we see, and it’s an expensive one to unwind.

When to Bring in a Pro

DIY crawl space work is genuinely doable for sealing, insulating, and organizing — but if you’re finding active rot in structural framing, standing water that returns after every rain, or piers that aren’t level, that’s a sign the problem is bigger than surface moisture. That’s the point where it makes sense to have someone experienced take a look before you build anything on top of it. If you’d rather skip the crawling around altogether, or just want a second opinion on what you’re seeing down there, our contact page is the easiest way to get in touch and have someone walk the space with you.

Either way, a little planning before you start goes a long way. Get the moisture problem handled first, keep it monitored, and the rest of your crawl space renovation ideas — storage, lighting, insulation, all of it — will actually stick around to be enjoyed instead of redone in a year or two.