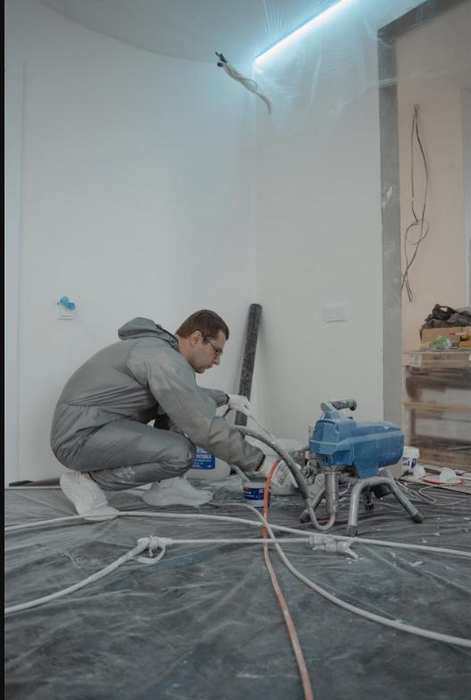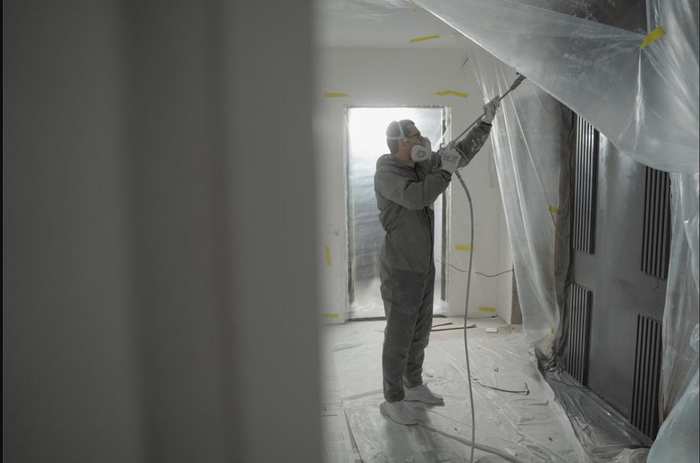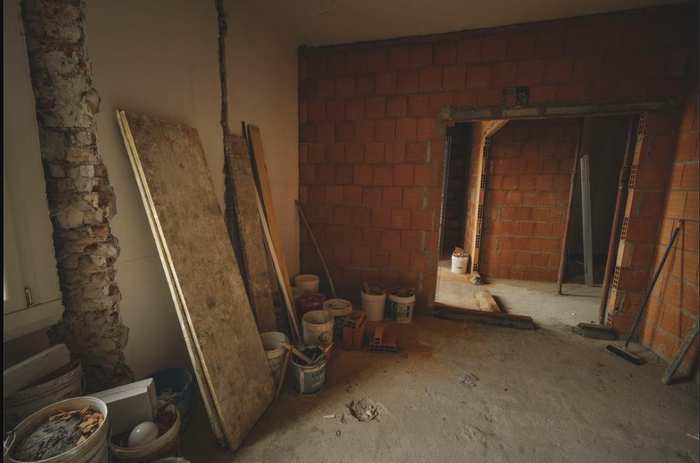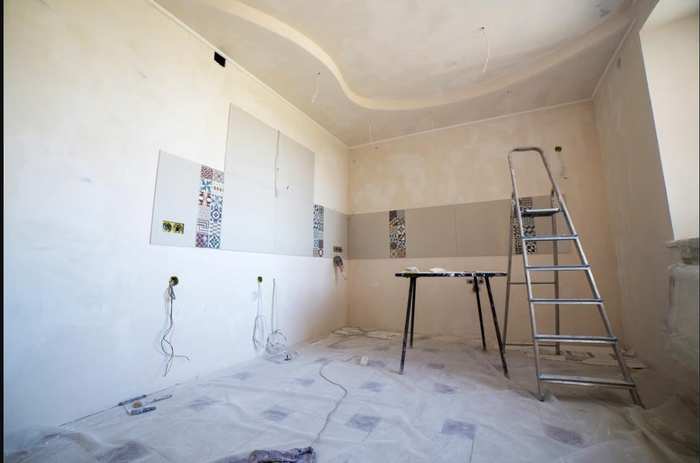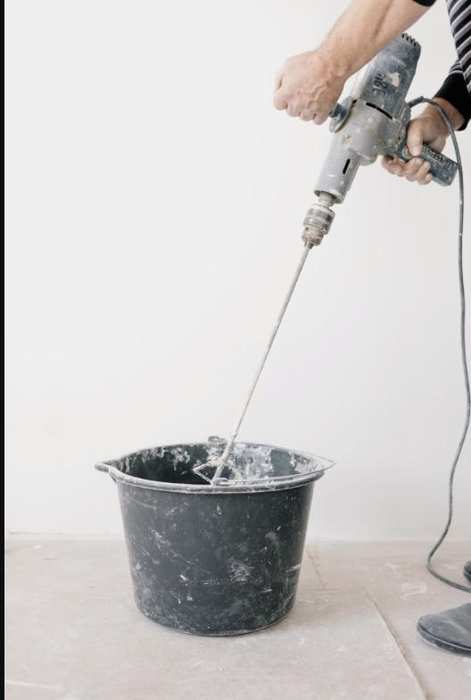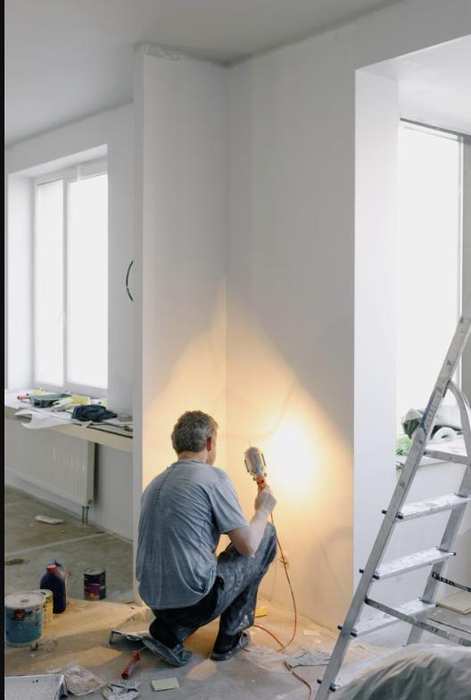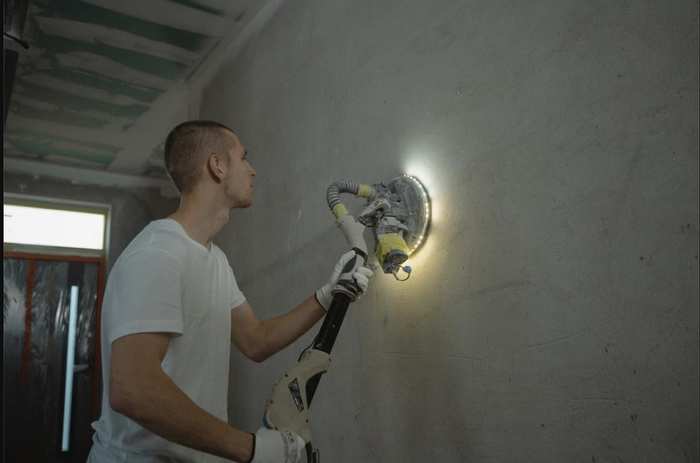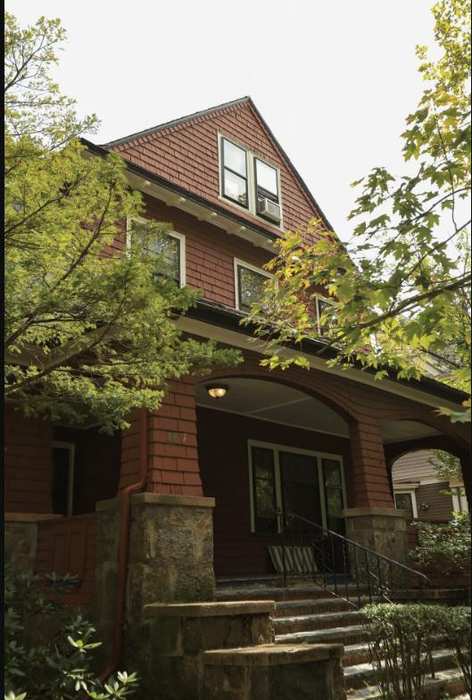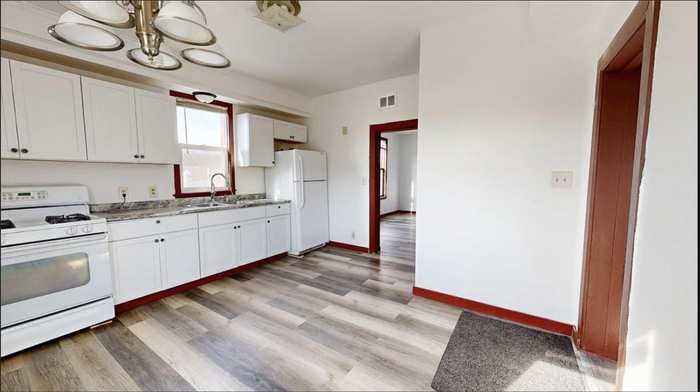
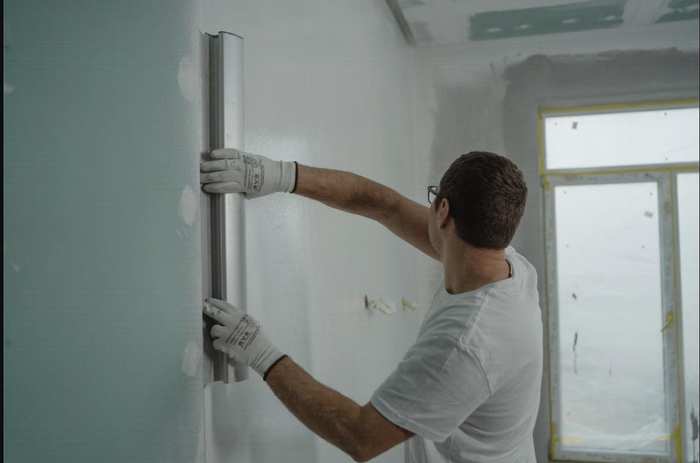
home renovation ideas on a budget

Home Renovation Ideas on a Budget That Actually Work

Every homeowner hits the same wall eventually: you love your house, but the kitchen feels dated, the bathroom grout is embarrassing, and the front porch has seen better days. Then you get a few quotes and your stomach drops. Here’s the good news — good home renovation ideas on a budget don’t require a second mortgage. They require knowing which projects give you the most visible change for the least money, and which ones you can safely do yourself on a weekend. We’ve spent years walking through homes around Covington and Slidell helping people figure out exactly that, and this guide is the same advice we’d give a neighbor.

Before you buy a single gallon of paint or swap out a faucet, it helps to think like a contractor for a minute. We don’t walk into a house and think ‘what can I sell this person.’ We think ‘what’s the cheapest fix that will make the biggest visual difference, and what’s actually broken versus just outdated.’ That distinction changes everything about how you spend your renovation dollars.

What to Look For When Choosing a Budget Renovation Project

Not every home renovation idea on a budget is created equal. Some projects cost almost nothing and completely change how a room feels. Others eat a weekend and a few hundred dollars and barely register. Here’s what separates the winners from the money pits.

High visibility, low cost. Anything at eye level or in a high-traffic area — hardware, lighting, paint, faucets — gives you outsized returns because people notice it every single day. A homeowner in Mandeville once told us she spent two years annoyed by her kitchen and then realized it was really just the cabinet hardware and a yellowed light fixture bothering her, not the cabinets themselves. Fifty dollars and an afternoon fixed what she thought was a five-thousand-dollar problem.

Reversible or low-risk. Budget renovations should rarely involve tearing into plumbing, electrical, or structural elements unless you know exactly what you’re doing. Paint, hardware, lighting fixtures, and surface-level updates are forgiving. If you mess up, you repaint or reinstall. Move a wall or reroute a drain line incorrectly, and you’re now paying a professional to fix your fix.

Tools you already have (or can justify buying). A big part of keeping a renovation budget-friendly is not renting or buying specialty equipment for a one-time job. If you’re going to be doing multiple projects around the house — and most budget renovators end up doing exactly that once they get the bug — it’s worth investing once in a solid set of tools rather than piecing things together project by project. A DEWALT 20V MAX Cordless Drill and Impact Driver Combo Kit (DCK240C2) style setup covers 90 percent of what a DIY renovator needs: hanging shelves, swapping hardware, assembling furniture, driving deck screws. If you’re starting from zero, this is the single best dollar-for-dollar purchase you can make before starting any budget renovation.
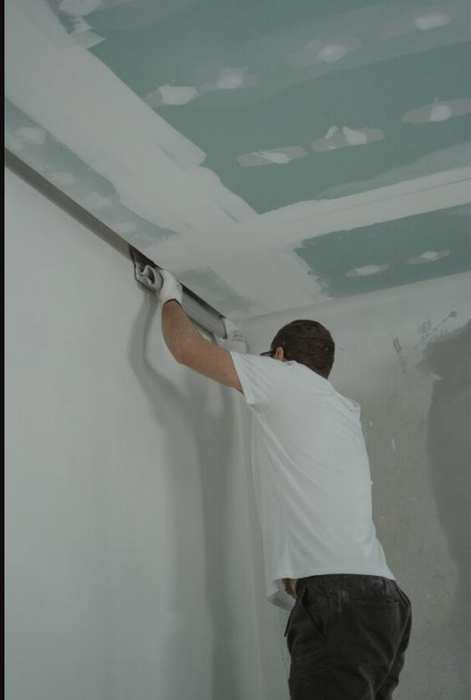
home renovation ideas on a budget

Home Renovation Ideas on a Budget, Room by Room

Let’s get specific. Below is how we’d prioritize spending if someone handed us a modest renovation budget and said ‘make this house feel new again.’

home renovation ideas on a budget

Kitchen: The Room With the Best Return

You don’t need new cabinets to transform a kitchen. In fact, full cabinet replacement is one of the worst dollar-for-visual-impact ratios in the whole house. Instead:

Paint or reface the cabinets you have. A cabinet color change — especially going from dated oak or honey-toned wood to a clean white, soft green, or navy — is one of the single biggest visual transformations available for under a few hundred dollars in paint and supplies. It takes patience (sanding, priming, multiple thin coats) but it’s genuinely a weekend-warrior project.

Swap the hardware. This sounds too simple to matter, but it’s not. New pulls and knobs in a modern finish — matte black, brushed brass, brushed nickel — change the entire personality of a kitchen for well under $150 in most cases.

Replace the faucet. A dated, spotted, or corroded faucet is one of the first things people notice, and modern pull-down faucets install in under an hour with basic tools.

Update the lighting. Swapping a builder-grade flush mount or dated pendant for something with real character is one of the cheapest ways to change how a whole kitchen feels at night, when most families actually spend time in there.

Backsplash tile, if you’re willing to learn. This is the one kitchen project on this list that requires real skill-building, but it’s absolutely within reach of a determined DIYer. A basic subway tile backsplash runs a few hundred dollars in materials and can be knocked out in a weekend if you’ve got the right tools. A wet saw makes a massive difference here — trying to score-and-snap your way through a full backsplash with a manual cutter is how projects turn into disasters. Something like the CHENYUCHAO 2300W Electric Tile Cutting System, 71\” Rail Guide, Wet/Dry gives you clean, consistent cuts around outlets and corners without chipping your tile.
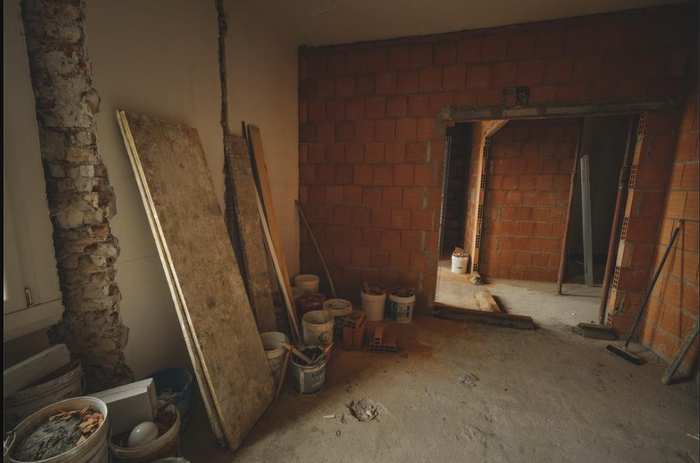
home renovation ideas on a budget

Bathroom: Small Room, Big Impact

Bathrooms are deceptively cheap to refresh because they’re small — less square footage means less material and less labor time, even if you’re paying yourself in sweat equity.

Regrout and re-caulk. This is genuinely the highest-impact, lowest-cost bathroom fix that exists. Grimy, cracked, or mildewed grout makes an entire bathroom look dirty even when it’s spotless. A weekend of regrouting and fresh caulk around the tub can make a 20-year-old bathroom look freshly renovated.

Reglaze or replace the vanity. A dated vanity with a laminate top can either be swapped for an inexpensive prefab unit or given new life with paint and a new countertop. This is one of the more approachable carpentry-adjacent projects for a beginner.

New mirror and light fixture. Builder-grade bathrooms almost always have a plain rectangular mirror and a strip of bulbs. A framed mirror and a modern vanity light fixture cost relatively little and change the whole feel of the room.

Toilet and faucet updates. These are mechanically simple swaps that most homeowners can handle with basic tools and an hour or two of patience — just make sure your water supply lines are in good shape before you start, since old, brittle lines are the actual cause of most bathroom leaks, not the fixtures themselves.
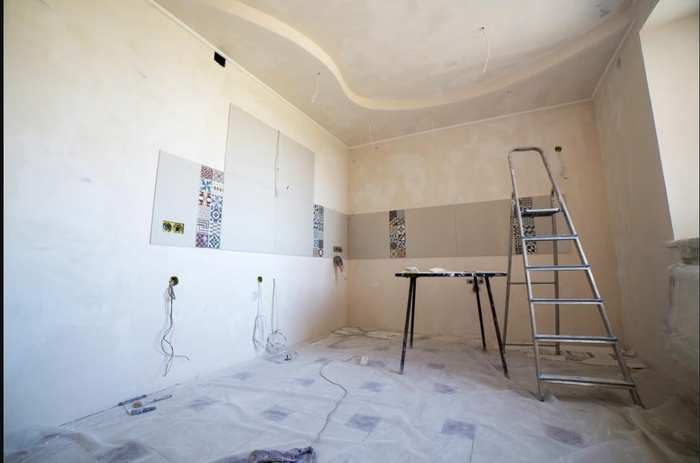
home renovation ideas on a budget

Paint: Still the Best Dollar-for-Dollar Renovation

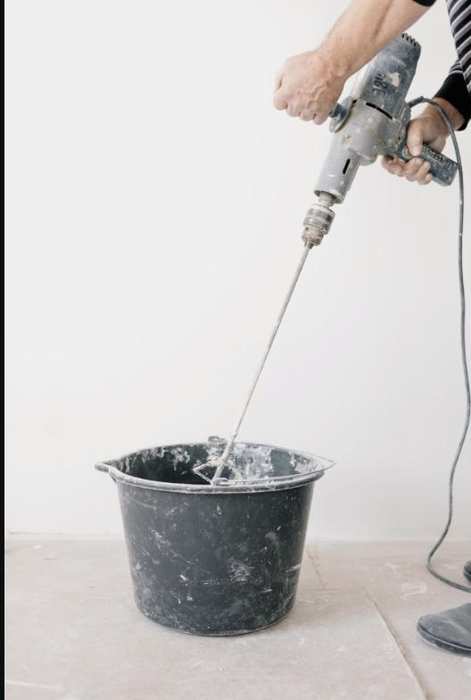
If you take away one thing from this guide, let it be this: paint remains the single best value in all of home renovation. Whole-house interior paint refreshes, accent walls, cabinet painting, exterior trim touch-ups, front door color changes — all of it delivers a disproportionate return relative to material cost. The main expense is your time and a little bit of prep work (sanding, patching, taping). If you’ve never tackled a full room before, resources like This Old House’s painting guides walk through prep and technique in more detail than we have room for here, and they’re worth a read before you start, especially if you’re dealing with older trim or plaster walls that may need extra prep.

One caveat worth taking seriously: if your home was built before 1978, don’t skip checking for lead paint before you start sanding or scraping. The EPA’s lead-safe renovation guidance lays out simple testing steps and safe work practices, and it’s a five-minute read that can prevent a serious health issue, especially if you’ve got young kids in the house.
home renovation ideas on a budget

Lighting and Hardware: The Cheapest Transformation in the Book

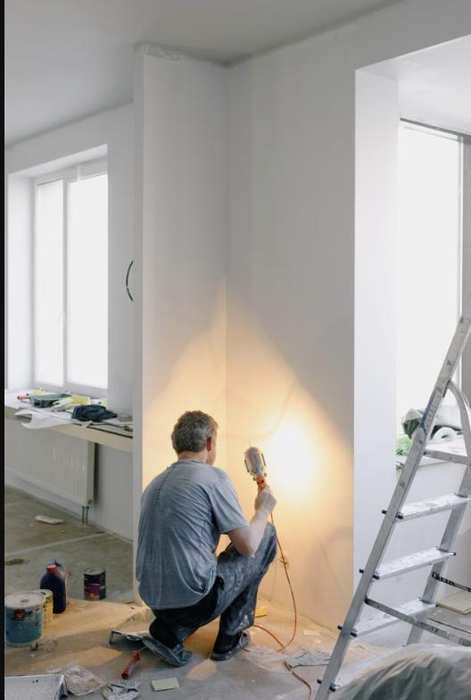
We already touched on this room by room, but it deserves its own mention because it’s one of the most underrated home renovation ideas on a budget across the entire house. Swapping out dated ceiling fixtures, cabinet pulls, door hinges, and switch plates is inexpensive, fast, and dramatically changes how ‘updated’ a home feels. Most of these projects require nothing more than a screwdriver and, for light fixtures, a basic understanding of how to safely cut power at the breaker before you start. If you’re not confident around a junction box, this is one of the few spots on this list where it’s worth pausing and asking whether it’s a job to hand off.
home renovation ideas on a budget

Curb Appeal: Cheap Wins Outside the House

The exterior of your home is the first thing anyone sees, and it’s also one of the most forgiving places to do budget renovation work.

Pressure wash everything. Siding, the driveway, the front walk, the porch — years of Louisiana humidity leave mildew and grime on every exterior surface, and a good pressure washing often makes a house look like it just got painted, for the cost of a rental or, if you’re going to use it more than once, an investment like the SIMPSON Cleaning PS3228 PowerShot 3300 PSI Gas Pressure Washer, Honda GX200. In our humid climate, this is honestly one of the highest-value maintenance tasks a homeowner can do, budget renovation or not.

Paint the front door. A bold, well-chosen front door color is one of the cheapest, highest-impact curb appeal moves available. It takes a can of paint and an afternoon.

Refresh the landscaping and mulch. Trimming overgrown shrubs, edging beds, and laying fresh mulch costs relatively little and instantly makes a home look cared for.

House numbers and mailbox. Small, cheap, and easy to overlook — but dated or mismatched house numbers are one of those details that quietly age a home.

Flooring: Where to Spend and Where to Skip

Full flooring replacement is rarely a true budget project, but there are exceptions worth knowing. Refinishing existing hardwood, rather than replacing it, is often dramatically cheaper and gives you a like-new floor. Laminate and luxury vinyl plank click-lock flooring have also gotten genuinely good and are within reach for a determined DIYer with basic tools, a straightedge, and patience — just budget extra time for acclimating the material to your home’s humidity before installation, which matters more here on the Northshore than it does in drier climates.

Getting the Right Tools Without Overspending

A lot of budget renovations stall out not because the project is too hard, but because the homeowner doesn’t have the right tool for the job and either buys the wrong thing or gives up. If you’re planning to tackle several of the projects above over the course of a year, it’s worth investing in a decent set of tools up front rather than buying cheap one-off items as you go. A well-rounded kit like the RYOBI P1819 18V ONE+ 6-Tool Combo Kit covers drilling, driving, cutting, and sawing needs across most beginner-to-intermediate projects, and the batteries are interchangeable across the whole RYOBI ONE+ line, so you’re not buying a new battery system every time you add a tool. If you know you’ll eventually be doing heavier work — deck repairs, framing small projects, cutting lumber for shelving — a step up to something like the DEWALT 20V MAX XR 3-Tool Brushless Combo Kit (DCK360D3) will serve you for years.

Our Honest, Opinionated Take

If we had to rank the best home renovation ideas on a budget by pure return on investment, it would look like this: paint first, hardware and lighting second, bathroom regrouting third, kitchen backsplash fourth, exterior pressure washing and curb appeal fifth. Full remodels of any kind — kitchen or bath — rarely belong in a true ‘budget’ conversation, because even a modest one quickly climbs into the tens of thousands once plumbing, electrical, and cabinetry get involved. The real magic of budget renovation is knowing that most of what makes a home feel ‘renovated’ is actually surface-level: color, hardware, cleanliness, and light. You can chase 80 percent of the visual impact of a full remodel for maybe 15 percent of the cost if you focus on those categories instead of structural change.

For homeowners who want a data-backed gut check on which renovations actually hold their value, Remodeling Magazine’s annual Cost vs. Value report breaks down average return on investment by project type and region, and it consistently backs up what we see in the field: smaller, cosmetic updates return more per dollar spent than large-scale remodels.

That said, some projects genuinely aren’t DIY-friendly no matter how tight the budget, and it’s worth being honest with yourself about which ones those are. Anything involving load-bearing walls, gas lines, main electrical panels, or roof structure should go to a licensed professional every time — not because you’re incapable, but because the cost of a mistake there isn’t measured in wasted paint, it’s measured in safety and in your home’s value. If you’re weighing a project and you’re not sure which category it falls into, it’s worth a quick conversation before you start tearing into anything. We’re always happy to talk through a project honestly, even if the answer is ‘yeah, you can absolutely do that yourself.’

Bringing It All Together

The best home renovation ideas on a budget aren’t about doing less — they’re about spending smarter. Prioritize the changes that touch what you see and touch every day: paint, hardware, lighting, grout, and curb appeal. Save the big structural money for the projects that actually need it. And if you get partway into a project and realize it’s bigger than you expected, or you just don’t have the weekend to spare, that’s what we’re here for — you can always get a free quote from our team and we’ll tell you honestly whether it’s a two-hour fix or something worth handing off. Either way, you’ll walk away with a home that finally feels the way you always pictured it, without the budget blowing up along the way. If you want to see the kind of work we handle when a project does need a professional touch, our full list of home improvement services covers everything from kitchens and baths to exterior repairs across Covington and Slidell. And if you’re just starting your renovation journey, our step-by-step guide to painting a room like a pro is a great next stop before you pick up a brush.
crawl space renovation ideas

Crawl Space Renovation Ideas That Actually Add Value

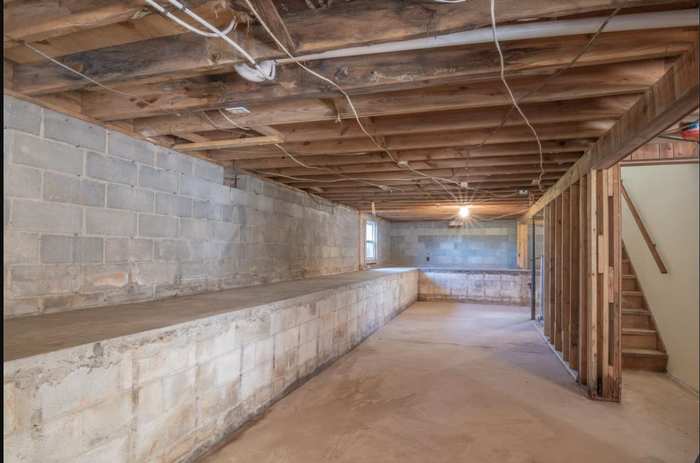
If you’ve spent any time under your house in south Louisiana, you already know the drill: musty air, damp dirt or crumbling old plastic sheeting, maybe a little standing water after a hard rain. Before you start dreaming up crawl space renovation ideas that make the space more useful, it helps to know which upgrades actually matter here on the north shore versus what works in a drier climate. Our humidity, high water table, and hurricane season change the whole equation. This guide walks through what to prioritize, what’s worth the money, and where a project like this can go sideways if you skip a step.

We say this a lot, but it bears repeating up front: a crawl space in Covington or Slidell is not the same animal as a crawl space in Colorado or Ohio. Ours sits closer to the water table, deals with more rainfall, and spends most of the year in near-constant humidity. That means the crawl space renovation ideas that work great in a Pinterest photo from a dry climate can actually cause problems here if you copy them without adjusting for our conditions. Keep that in mind as you read through each idea below — we’ve tried to flag where the local climate changes the calculus.

What to Look For Before You Try Any Crawl Space Renovation Ideas

Every good crawl space renovation idea starts with the same question: is the space dry and structurally sound? It doesn’t matter how nice your new storage shelving or vapor barrier looks if moisture is still working its way in through the soil, foundation vents, or a cracked pier. In our climate, that’s rarely a maybe — it’s almost always happening to some degree. So before you shop for materials or plan out a layout, walk your crawl space with a flashlight and check for:

– Standing water or damp soil, especially near the low corners
– Wood rot or soft spots on joists and sill plates
– Visible mold, mildew, or that unmistakable musty smell upstairs
– Sagging or torn vapor barrier (or none at all)
– Rusted metal fasteners or ductwork, a sign of chronic humidity
– Gaps around pipe penetrations, vents, or the crawl space door

Take your time on this walkthrough — it’s genuinely the most important hour you’ll spend on the whole project. Bring a notepad or your phone and photograph anything that concerns you, section by section, so you’re not relying on memory later when you’re deciding what to fix first. It also helps to check after a heavy rain rather than during a dry stretch, since a lot of moisture issues only show themselves when the ground is saturated. If you find active water intrusion or rot in the framing, that needs to be solved first — no renovation idea is worth building on top of a moisture problem. The EPA has a solid, practical guide to mold, moisture, and your home that’s worth a read before you buy a single piece of material, since a lot of these fixes overlap with mold prevention.

crawl space renovation ideas

Idea #1: Full Encapsulation (The Foundation of Everything Else)

Encapsulation means sealing the crawl space off from outside air and ground moisture with a heavy-duty vapor barrier (typically 10-20 mil poly sheeting) that covers the soil and runs up the foundation walls, combined with sealed vents and sometimes conditioned air. For homes in Covington and Slidell, this is usually the single most valuable upgrade you can make, full stop. It protects your subfloor, your ductwork, your indoor air quality, and it’s the prerequisite for basically every other crawl space renovation idea on this list.

The actual process breaks down into a handful of stages: clearing out old debris and any existing torn plastic, addressing any active moisture sources (grading, gutters, or a French drain if water is actively pooling), laying and seaming the vapor barrier so it overlaps properly at every seam, taping it, running it up the foundation walls a few inches, and sealing foundation vents so outside humid air can’t undo all that work. Some homeowners stop there; others add a dedicated supply of conditioned air from the HVAC system, which is a bigger step and usually worth having an HVAC contractor weigh in on.

DIY encapsulation is doable for a motivated homeowner with a free weekend (or two), but it’s physically miserable work — you’re on your belly in tight, dusty spaces taping seams and stapling barrier material, often in July heat that makes an already claustrophobic job feel worse. Wear a respirator rated for dust and mold spores, not just a paper mask, and bring a headlamp so both hands stay free. A drill/driver combo makes fastening trim boards and vent covers much faster than doing it by hand; something like the DEWALT 20V MAX Cordless Drill and Impact Driver Combo Kit handles both the drilling and driving you’ll need without swapping tools mid-crawl. Budget more time than you think — most first-timers underestimate how long seam-taping alone takes, especially around pipes, ductwork, and support piers that break up an otherwise simple rectangle of floor space.

crawl space renovation ideas

Idea #2: A Dedicated Crawl Space Dehumidifier

Once the space is sealed, humidity has nowhere to escape unless you actively manage it. This is the step people skip and then wonder why their encapsulation “didn’t work.” A crawl space needs its own dehumidifier sized for the square footage — not a little portable unit meant for a bedroom. The ALORAIR Galaxy 60 Crawl Space Dehumidifier 145 PPD, Up to 1,800 Sq. Ft. is built specifically for this kind of low-clearance, high-moisture environment, with automatic drainage so you’re not hauling a bucket out every few days. In our climate, running one of these year-round isn’t overkill — it’s basically mandatory if you want the space to stay dry.

When you’re sizing and placing the unit, think about airflow the same way you would for a room upstairs. Set it up near the center of the space if possible, away from the direct path of the sump pump discharge line, and route the condensate drain to daylight or into an existing drain line rather than letting it pool nearby. Most units have a humidistat you can set and mostly forget — aim to keep relative humidity in the 50-55% range, which is low enough to stop mold and wood rot without drying out framing unnecessarily. Check the filter every couple of months; in a dusty, freshly renovated crawl space, it’ll clog faster than the manual suggests.

Worth noting: during hurricane season, power outages are common, and a dehumidifier that shuts off for three days during a tropical storm can undo weeks of progress, especially if that outage coincides with heavy rain and a saturated water table pushing moisture toward your foundation. A backup power source like the Generac 8011 GP7500E 7,500-Watt Dual-Fuel Portable Generator can keep a dehumidifier (and a sump pump, if you have one) running through an outage, which matters more here than in almost any other part of the country. It’s the kind of purchase that feels like overkill until the one August you’re glad you have it.

crawl space renovation ideas

Idea #3: Smarter Insulation for Our Climate

Traditional fiberglass batts stapled between the joists are a common sight in older homes, but they’re actually one of the worst options for humid climates — they trap moisture against the wood and become a breeding ground for mold, and they tend to sag and fall over time as the paper facing degrades. If you’re updating insulation as part of your crawl space renovation ideas, rigid foam board against the foundation walls (paired with encapsulation) performs far better than batts against the subfloor. It’s a bigger shift in approach than most homeowners expect, but it’s the difference between insulation that lasts and insulation you’re replacing again in five years.

The logic here is worth understanding, not just following blindly: once you’ve encapsulated and conditioned the crawl space air, you’re treating the space more like a sealed basement than a vented attic. Insulating the perimeter walls instead of the subfloor keeps the whole crawl space — including your ductwork and any plumbing down there — inside the home’s conditioned envelope. That’s a meaningfully different approach than what a lot of national how-to articles recommend, because most of them are written for climates where vented crawl spaces still make sense. Ours generally don’t.

crawl space renovation ideas

Idea #4: Smart, Off-the-Ground Storage

Once the space is dry and sealed, a crawl space can genuinely earn its keep as storage — holiday decorations, off-season gear, extra building materials. The key rule: nothing touches the vapor barrier or sits directly on the ground, even a sealed one. Freestanding wire shelving units or wall-mounted brackets keep bins up off the floor and away from any residual dampness. Stick to plastic totes rather than cardboard boxes, since cardboard wicks moisture even in a well-controlled space.

A few extra habits go a long way here too. Label totes clearly and keep a simple inventory list taped inside the access door, since crawl space storage tends to become out-of-sight, out-of-mind otherwise. Avoid storing anything you’d be genuinely upset to lose — even a well-encapsulated crawl space is still more exposed to temperature swings, pests, and the occasional plumbing leak than an interior closet. Think seasonal decorations and bulky, replaceable items rather than family photos or important documents.

crawl space renovation ideas

Idea #5: Lighting and Easier Access

If you’re going to be down there regularly — checking the dehumidifier, grabbing storage bins, doing seasonal HVAC maintenance — a couple of battery-powered or hardwired LED puck lights and a properly sized access door make a bigger quality-of-life difference than people expect. A wider, insulated crawl space door also helps keep conditioned air where it belongs if you’ve gone the encapsulation route. This is a nice weekend add-on once the bigger structural and moisture work is done.

If you’re running any wiring down there for lighting, treat it with the same caution you would in a damp basement — use fixtures and connectors rated for damp locations, and if you’re not fully comfortable running low-voltage wiring yourself, this is an easy task to hand off to an electrician for an hour rather than risk a bad connection in a space you’ll rarely be checking on. The Consumer Product Safety Commission and most local codes are strict about damp-location fixtures for good reason.

crawl space renovation ideas

Idea #6: Reinforcing Framing and Support Piers

While you’re already under there, it’s worth inspecting and, if needed, sistering (reinforcing) any joists that show early signs of sagging or rot, and checking that support piers are level and properly shimmed. This isn’t the most exciting item on a list of crawl space renovation ideas, but catching a minor structural issue now is a lot cheaper than dealing with a sagging floor upstairs later. A full-size tool combo kit like the CRAFTSMAN V20 7-Tool Combo Kit (CMCK700D2) covers the drilling, cutting, and fastening you’d need for this kind of framing work without buying tools piecemeal.

When you’re checking piers, bring a 4-foot level and a flashlight, and look for gaps between the pier cap and the beam it’s supporting — even a small gap means the pier isn’t doing its job and the load is shifting elsewhere. Minor shimming with hardwood shims or pressure-treated cedar shingles is a reasonable DIY fix. If you’re seeing piers that have visibly sunk, tilted, or cracked, or joists with rot beyond surface staining, that’s a sign the issue has been developing for a while and it’s worth having someone experienced confirm the scope before you sister anything yourself.

What Doesn’t Make Sense Here: Turning It Into Living Space

You’ll see plenty of crawl space renovation ideas online about converting the space into a mini rec room or extra storage “basement.” In most of Covington and Slidell, that’s not realistic — our crawl spaces are typically 18 to 36 inches of clearance, built that way specifically because of our high water table and flood risk. Digging out a crawl space to create headroom, the way people do up north to build basements, isn’t something to take on as a DIY project; it involves foundation engineering, drainage, and permitting that’s well outside weekend-project territory. If you’re set on more usable square footage, that conversation is better had with a contractor who can evaluate your specific foundation and site — our team can walk you through what’s realistic during a free quote if you want an honest read on it.

Our Honest Take

If we’re being straight with you: encapsulation plus a proper dehumidifier is the crawl space renovation idea that matters most in this region, and it’s not close. Everything else on this list — storage, lighting, insulation upgrades — only holds up long-term once moisture is under control. We’ve seen too many homeowners spend money on nice shelving or fresh insulation only to have it ruined within a year because the underlying humidity problem was never addressed. Start there, and everything else becomes a much easier, more satisfying project. For more on the sealing process itself, the step-by-step guide to encapsulating your crawl space on our blog covers the materials and technique in more detail, and Family Handyman’s overview of crawl space moisture control is a good second opinion on the approach.

If you’re trying to prioritize on a budget, tackle it in this order: fix any active water intrusion first, then encapsulate, then add the dehumidifier, then move on to insulation, storage, and lighting as time and money allow. Doing it in reverse — buying nice shelving before the moisture problem is solved, for instance — is the single most common mistake we see, and it’s an expensive one to unwind.

When to Bring in a Pro

DIY crawl space work is genuinely doable for sealing, insulating, and organizing — but if you’re finding active rot in structural framing, standing water that returns after every rain, or piers that aren’t level, that’s a sign the problem is bigger than surface moisture. That’s the point where it makes sense to have someone experienced take a look before you build anything on top of it. If you’d rather skip the crawling around altogether, or just want a second opinion on what you’re seeing down there, our contact page is the easiest way to get in touch and have someone walk the space with you.

Either way, a little planning before you start goes a long way. Get the moisture problem handled first, keep it monitored, and the rest of your crawl space renovation ideas — storage, lighting, insulation, all of it — will actually stick around to be enjoyed instead of redone in a year or two.

small house renovation ideas

Small House Renovation Ideas That Actually Work

If your house feels like it’s shrinking a little more every year, you’re not imagining it — you’re just accumulating stuff faster than your square footage is growing. The good news is that some of the best small house renovation ideas cost a lot less than a full addition and deliver a lot more livable space than you’d think. We’ve walked through hundreds of homes in Covington and Slidell that felt cramped not because they were actually small, but because they were laid out or finished in a way that fought against their size. Fix that, and a 1,400-square-foot house can live bigger than a 2,200-square-foot one down the street.

A lot of the older housing stock around here — camelback shotguns near downtown Covington, brick ranches from the 60s and 70s in Slidell, cottages tucked along the north shore — was built efficiently for its era, but not necessarily for how families live today. Closets were an afterthought, kitchens were closed off from everything else, and bathrooms were sized for one person at a time. None of that means you need to add square footage. It means you need to rethink how the square footage you already have is being used, and that’s exactly what good small house renovation ideas do.

What Makes a Small House Renovation Idea Actually Work

Before we get into specific rooms, it helps to know what separates a renovation idea that’s genuinely worth your weekend from one that’s just Pinterest bait. Three things matter most:

It multiplies function. In a small house, every square foot should be doing at least one and a half jobs. A bench that’s also storage. A peninsula that’s also a breakfast bar. If a renovation only does one thing, ask if there’s a version that does two.

It borrows light or sightlines. Small spaces feel bigger when you can see farther into them, or when light travels further through them. This is why so many good small house renovation ideas involve removing a wall, swapping a solid door for glass, or simply repainting a dark hallway.

It’s honest about your budget. A lot of small-space renovation content online assumes you’ve got $40,000 and a design team. We’re going to stick to projects a motivated homeowner can actually plan, price out, and often tackle themselves — with a clear note when it’s time to bring in a pro instead.

There’s a fourth thing worth mentioning too: it respects the order projects should happen in. It’s tempting to jump straight to the fun stuff — new tile, a fresh paint color, a built-in bench — before you’ve dealt with the boring stuff underneath it. Moisture problems, outdated wiring, and settling issues don’t announce themselves loudly in a small house the way they might in a bigger one with more space to hide the symptoms. Sequencing matters. Fix what’s hidden first, then spend your energy and money on what shows.

small house renovation ideas

Kitchen Renovation Ideas for Small Houses

You don’t need to gut a small kitchen to make it feel twice as big. Start with what’s actually eating your visual space:

Open shelving on one wall. Swapping a couple of upper cabinets for open shelves instantly makes a galley kitchen feel less boxed-in, and it’s an easy weekend project. Just make sure you’re anchoring into studs — a good DEWALT 20V MAX Cordless Drill and Impact Driver Combo Kit makes quick, clean work of it and you’ll use it for a dozen other projects on this list.

Under-cabinet lighting. This is the cheapest transformation on this entire page. A dim kitchen reads small no matter its footprint; a well-lit one reads twice as big, even at 10×12 feet.

Lose the upper cabinets over one run entirely. If your kitchen backs up to a wall that doesn’t need full storage, a floating shelf and a tile backsplash that runs to the ceiling creates a visual break that tricks the eye into reading more height and depth.

Paint or reface instead of replace. If your cabinet boxes are solid — check the corners and hinges for water damage or sagging before you commit — a fresh coat of cabinet-grade paint and new hardware can transform a dated kitchen for a few hundred dollars instead of several thousand. Swap builder-grade knobs for something with a little more presence, and don’t underestimate how much a matte black or brushed brass pull can do against a light-painted cabinet.

Pull one appliance out of the footprint. A lot of small kitchens got a bulky microwave-over-range combo or an oversized fridge crammed in decades ago because that’s what was available at the time. Swapping to a slimmer counter-depth fridge or moving the microwave to a drawer unit under the counter can free up several inches of walking room — which, in a kitchen under 100 square feet, is a meaningful percentage of your total space.

A dedicated pantry cabinet, even a narrow one. An 18-inch-wide pull-out pantry tucked into a gap next to the fridge holds more than most people expect, and it clears counter clutter that’s usually the real reason a small kitchen feels chaotic.

For the backsplash tile itself, a rail-guided wet saw like the CHENYUCHAO 2300W Electric Tile Cutting System gives you the clean, straight cuts that make a small kitchen backsplash look intentional instead of DIY-obvious — that’s genuinely the difference between a project that looks custom and one that looks like a shortcut.

small house renovation ideas

Bathroom Ideas That Make Small Feel Spa-Like

Bathrooms are usually the smallest rooms in the house and the ones people give up on fastest — which is a shame, because they respond incredibly well to small changes.

Wall-mounted or floating vanity. Pulling the vanity off the floor and letting the eye see all the way to the baseboard makes even a 5×7 bathroom feel less closed-in. It’s a moderate DIY project — plumbing lines usually need to be relocated slightly, which is a good moment to decide if you’re comfortable with it or if it’s worth getting a free quote from a licensed plumber first.

Swap the tub for a curbless or low-curb shower. If you’ve got a rarely-used tub in a small bath, converting it to a walk-in shower with a glass panel (instead of a shower curtain) opens up sightlines dramatically. This is one of the small house renovation ideas that pays off in resale value too, especially with buyers thinking ahead to aging in place.

Large-format tile, fewer grout lines. Fewer visual breaks in the floor or shower walls make the room read larger. Big tile plus a good wet saw (again, the CHENYUCHAO 2300W Electric Tile Cutting System handles large-format cuts well) is a very achievable weekend-to-week project for a patient first-timer.

A bigger mirror, not a bigger room. Most builder-grade bathrooms come with a mirror sized to match a specific vanity width, which almost always undersells the room. Sizing the mirror to the full width of the vanity, or even wall-to-wall, bounces more light around the room and makes the ceiling feel higher than it is. It’s one of the easiest swaps on this whole list and rarely costs more than a Saturday afternoon.

Don’t ignore the exhaust fan. This one’s boring, but Louisiana humidity means an undersized or poorly vented bathroom fan isn’t just a comfort issue — it’s a mold issue waiting to happen behind your new tile. If you’re already opening up the ceiling for other work, upgrading to a higher-CFM fan rated for your bathroom’s square footage is cheap insurance.

small house renovation ideas

Living Areas and Storage: Where Small Houses Actually Get Their Space Back

This is where most small house renovation ideas earn their keep, because storage — or the lack of it — is usually the real reason a house feels small, not the square footage itself.

Built-ins around a fireplace or in an awkward alcove. Every small house has one dead corner that’s too narrow for furniture but too big to ignore. A simple built-in bookshelf or bench with storage underneath turns that dead zone into the most-used spot in the house.

Closet reconfiguration before closet expansion. Before you knock out a wall to make a closet bigger, try reconfiguring what’s inside it first. Double-hanging rods, shelf dividers, and better use of vertical space often solve 80% of the storage complaint for a fraction of the cost.

Convert a hallway dead-end into a mudroom nook. A bench, hooks, and a few cubbies at the back door does more for daily livability in a small house than almost any other single project, and it’s a great one for a beginner working with a starter tool set like the RYOBI P1819 18V ONE+ 6-Tool Combo Kit.

Furniture that works twice as hard. In a small living room, a coffee table with storage underneath, an ottoman that opens up, or a daybed that doubles as a guest bed does more for livability than almost any wall you could remove. This is less a renovation and more a furnishing strategy, but it belongs on this list because it’s often cheaper and faster than any construction project, and it buys you time to plan the bigger stuff.

Consistent flooring between rooms. If your small house has three different flooring materials across the living room, dining area, and kitchen, each transition is a visual stop sign that makes the whole floor plan feel chopped up. Running one consistent flooring material — even a mid-grade laminate or engineered hardwood — through the main living spaces is one of the more underrated small house renovation ideas because it doesn’t add space, it just stops interrupting the space you already have.

Paint ceilings a shade lighter than walls, not stark white. A lot of small rooms get painted with bright white ceilings and a bold wall color, which actually draws a hard line where the wall meets the ceiling and makes the room feel shorter. Painting the ceiling a very pale tint of the wall color softens that line and reads as taller, more open space.

The This Old House library has some genuinely good breakdowns of built-in techniques if you want a second set of eyes on joinery and finish details before you commit lumber.

small house renovation ideas

Exterior and Curb Appeal Ideas for Small Houses

A small house can look charming or it can look like an afterthought, and the difference is almost always maintenance and paint, not size.

Pressure wash the exterior, walkways, and driveway. This is the single highest-return, lowest-effort project on this whole list. A machine like the SIMPSON Cleaning PS3228 PowerShot 3300 PSI Gas Pressure Washer will strip years of Louisiana humidity grime and mildew off siding and concrete in an afternoon, and the visual difference is honestly dramatic.

Paint the front door and trim. A dark, saturated front door against light trim reads as intentional design, not accident, and it’s one of the cheapest small house renovation ideas that actually shows up in appraisal comps.

Add outdoor lighting along the walkway. Just like inside, light makes small spaces read bigger — this applies to yards too. A well-lit path from the driveway to the door makes even a modest lot feel considered.

Simplify the landscaping instead of expanding it. Overgrown foundation shrubs are one of the fastest ways to make a small house look even smaller from the street — they visually eat into the house’s footprint. Trimming shrubs back below the windowsills and adding a clean mulch bed edge makes the whole house read bigger and better maintained, often in a single weekend.

Upgrade house numbers and the mailbox. These are small, inexpensive details, but they’re also some of the first things a visitor or an appraiser notices. Modern, properly sized house numbers and a mailbox that matches your trim color pull the whole exterior together for well under $100.

small house renovation ideas

Don’t Skip What’s Under the House

This one’s specific to our part of Louisiana, and it doesn’t show up on most national small house renovation ideas lists, but it should. Covington and Slidell’s humidity is brutal on crawl spaces, and a damp crawl space doesn’t just risk mold and wood rot — it makes the whole house feel muggy and musty no matter what you do upstairs. If you’ve got a crawl space, a unit like the ALORAIR Galaxy 60 Crawl Space Dehumidifier is one of the least glamorous but most effective renovation dollars you can spend — it protects every other project you’re about to invest in upstairs. The EPA’s guidance on moisture and mold control is worth a read if you’ve never dealt with crawl space humidity before; it’ll change how you think about ventilation and vapor barriers.

Signs you’ve got a problem worth addressing: a musty smell in the room directly above the crawl space, insulation sagging or falling from the floor joists, or visible condensation on ductwork when you check under the house on a humid morning. None of these are dramatic, which is exactly why they get ignored for years while the wood underneath your new kitchen floor slowly loses its structural integrity. Pair a dehumidifier with a proper vapor barrier on the ground, and you’ve addressed the root cause instead of just masking the symptom.

small house renovation ideas

Our Honest Take: Which Small House Renovation Ideas Are Worth It

If you asked us to rank every idea on this page by dollars-to-impact, it wouldn’t be close. Paint, lighting, and storage reconfiguration beat almost every big-ticket renovation for the money. A full kitchen gut can run $25,000 and still leave you with the same footprint you started with. Open shelving, better lighting, a repainted door, and one smart built-in can transform how a small house feels for under a tenth of that cost — and most of it is doable with a basic set of hand and power tools, whether that’s a starter kit or something more robust like the CRAFTSMAN V20 7-Tool Combo Kit if you’re planning to tackle several of these projects over time.

To put real numbers on it: a full kitchen gut-and-replace in this area typically runs somewhere between $20,000 and $45,000 depending on cabinetry and countertop choices, and that’s before you’ve changed the room’s actual layout or footprint. Compare that to open shelving, new hardware, under-cabinet lighting, and a fresh coat of cabinet paint, which most homeowners complete for under $1,500 in materials if they’re doing the labor themselves. That’s not a knock on full remodels — sometimes the layout genuinely needs to change, and that’s worth the investment — but if your goal is simply making the house feel bigger and more livable, the smaller list of small house renovation ideas usually gets you there faster and for a fraction of the cost.

A good rule of thumb: tackle the projects that touch light, storage, and sightlines first. Those are the ones that change how a room feels every single day. Save structural changes — moving walls, expanding a footprint, reconfiguring plumbing runs — for after you’ve lived with the smaller fixes for a while and can tell whether you still want the bigger change, or whether the small stuff already solved the problem.

Where we’d tell you to slow down and think twice is anything involving structural walls, plumbing relocation, or electrical work in an older home — a lot of homes in this area still have original wiring or lead-based paint from before 1978, and that’s a place where DIY enthusiasm needs to meet real caution. The EPA’s Lead-Safe Certified guidance is a good starting point if your house predates that and you’re planning any renovation that disturbs painted surfaces.

When to Call In Help Instead

Most of what’s above is genuinely within reach for a patient DIYer with the right tools and a Saturday or two. But if you get into a project and find a wall isn’t where you thought it was, or a vanity move uncovers old galvanized plumbing that’s seen better days, that’s not a failure — that’s just the point where the smart move is bringing in someone who does this daily. We’d rather see you finish a project safely with a pro’s help than get halfway through and stall out. If that’s where you land, our renovation services page walks through what we handle for homeowners around Covington and Slidell, and you can always reach out for a free quote if you’d rather just talk it through before you buy a single tool.

A few specific red flags worth knowing before you start: aluminum branch wiring in homes built in the 1960s and 70s (common enough in this area that it’s worth a quick check with a flashlight at your panel), cast iron drain lines original to a house built before the 1980s, and any wall you’re not 100% sure is non-load-bearing. None of these are DIY dealbreakers on their own, but they’re the kind of thing that turns a small weekend project into a much bigger one if you don’t catch it before you start swinging a hammer. A five-minute conversation with a contractor before demo day is a lot cheaper than finding out after.

Small houses have a way of rewarding thoughtful renovation more than big ones do — every choice is visible, every improvement is felt daily, and you don’t need a huge budget to make a real difference. Pick one room, start with the idea that scares you least, and go from there.

1930s house renovation ideas

1930s House Renovation Ideas: DIY or Hire a Pro?

There’s a special kind of anxiety that comes with owning a house built in the 1930s. You love the plaster walls, the original heart pine floors, the little quirks that new construction just doesn’t have. But you also know that behind those charming details might be knob-and-tube wiring, horsehair plaster, or a foundation that’s settled a few inches since Roosevelt was in office. When you start Googling 1930s house renovation ideas at 11pm, you’re really asking one question: can I do this myself and save the money, or am I about to turn a weekend project into a six-month nightmare?

That tension is real, and it’s not something to just push past with enthusiasm. Older homes reward careful, informed DIY work — and punish overconfident DIY work — more than almost any other kind of house. This post is here to help you actually run the numbers, not talk you into or out of anything.

We hear versions of this same question constantly from homeowners in Covington and Slidell, where entire streets are lined with 1930s and 1940s bungalows and cottages. Some renovation wish lists are simple — new paint, refinished floors, updated hardware. Others get complicated fast: opening a wall for a kitchen expansion and finding balloon framing instead of standard studs, or discovering the ‘1930s bathroom’ is actually running on galvanized pipe that’s been slowly rusting shut from the inside for eighty years. Good 1930s house renovation ideas start with an honest inventory of what you’re dealing with, not just a mood board.

What DIY Actually Costs on a 1930s Renovation

Let’s start with materials and tools, because this is where most people underestimate. A straightforward-sounding project — say, refinishing original hardwood floors in a 1930s living room — sounds cheap on paper. Rental sander, a few cans of finish, some sandpaper. Maybe $300-400. But 1930s floors often have old nail heads, uneven boards from decades of settling, and finishes that may contain lead if they haven’t been redone since. Add in edge sanders, respirators, and the inevitable extra trip to the rental store when you gouge a board, and you’re often closer to $600-900 for a single room done right.

Bathroom retiling is another classic 1930s project — those small hex-tile floors are iconic, but the subfloor underneath is rarely square or level anymore. If you’re tackling it yourself, a tool like the CHENYUCHAO 2300W Electric Tile Cutting System, 71″ Rail Guide, Wet/Dry makes clean, straight cuts on tricky tile a lot more achievable than a handheld wet saw, especially with the small-format tile that’s popular in original 1930s bathrooms. Between tile, thinset, backer board, grout, and rental or purchased tools, budget $800-1,500 for a small bathroom floor, more if you’re also doing walls or a tub surround.

Painting is often the entry point project for people testing out 1930s house renovation ideas, and it deserves a closer look too. Original plaster walls take paint differently than drywall — they’re more porous in some spots, patched in others from decades of nail holes and cracks, and often covered in multiple layers of older paint that may need a stain-blocking primer before anything new goes on. Budget for quality primer, extra sanding sponges, and patching compound beyond what a big-box paint calculator tells you; a single 12×14 room with cracked plaster can easily eat $150-200 in prep materials alone before you’ve opened a single can of finish paint.

Kitchens are trickier. Full cabinet replacement in a 1930s kitchen often means working around plumbing and electrical that wasn’t installed with modern appliance clearances in mind, and cabinet boxes rarely arrive perfectly sized for a 90-year-old room with out-of-square walls. Refacing existing cabinets instead of replacing them is a genuinely good DIY entry point — new doors, hardware, and a fresh coat of cabinet-grade paint can transform the room for $600-1,200 in materials, a fraction of a full replacement, and it preserves the scale and proportions original to the house.

Electrical and general carpentry work around the house — hanging doors that have shifted with the foundation, replacing outlets, building shelving into oddly-shaped closets — is where a solid cordless tool set earns its keep. A DEWALT 20V MAX Cordless Drill and Impact Driver Combo Kit (DCK240C2) or, if you want more bits and pieces for a house full of projects, the DEWALT 20V MAX 9-Tool Combo Kit (DCK940D2) will cover most of what a 1930s renovation throws at you, from driving screws into old-growth lumber to cutting trim.

If your project includes replacing outlets or switches — common in 1930s houses where two-prong outlets are still the norm — this is a good moment to talk about scope. Swapping a single ungrounded outlet for a properly grounded, GFCI-protected one is very doable for a confident DIYer once the panel itself is confirmed to be correctly grounded. But if you’re finding cloth-insulated wiring, aluminum wiring, or a fuse box instead of a breaker panel, that’s a different project entirely, and one where the cost of a mistake isn’t just money.

Don’t forget the unglamorous stuff. Many 1930s houses in the Covington and Slidell area have crawl spaces that trap humidity, which causes wood rot and mold long before anyone notices a problem. If you’re opening up floors or walls during a renovation, it’s worth running a unit like the ALORAIR Galaxy 60 Crawl Space Dehumidifier 145 PPD, Up to 1,800 Sq. Ft. for a few weeks before and after work to protect your investment. And if you’re pressure washing old brick or clapboard siding before painting, a machine like the SIMPSON Cleaning PS3228 PowerShot 3300 PSI Gas Pressure Washer, Honda GX200 will save you rental fees across multiple projects if you own the house long-term.

One more line item people forget: permits. Depending on scope, your local parish or city may require permits for electrical, plumbing, or structural work, even if you’re doing it yourself. Permit fees are usually modest — often $50-250 depending on the project — but skipping this step on a house this age can create real problems later, especially at resale, when an inspector or appraiser asks for documentation on work that was never permitted.

Add it all up across a multi-room renovation — floors, one bathroom, some electrical, exterior prep — and DIY material and tool costs typically land somewhere between $4,000 and $9,000, depending on scope. That’s real money, but it’s often 40-60% less than hiring out the same work. The catch is what comes next.

1930s house renovation ideas

What Your Time Is Worth

Here’s the part most DIY cost calculators skip entirely: your hours aren’t free, even if no check gets written for them. If refinishing that one room takes you three weekends instead of the two days a pro crew would need, that’s 20-25 hours of your life. If you make $35 an hour at your day job, that’s $700-875 of opportunity cost, even before you factor in the physical toll of sanding on your knees or the stress of living with dust everywhere.

Consider a real-world stretch: a homeowner decides to refinish original floors in two rooms plus a hallway over what they plan as three weekends. By the second weekend, they’ve discovered old nail heads gouging the sander’s drum, a soft spot near an exterior wall that needs subfloor repair before finishing can even start, and a finish that requires two extra coats because the wood absorbed it unevenly. Three weekends becomes five. That’s not a failure — it’s simply how these houses tend to go — but it’s worth planning for before you start, not after you’re three weekends deep.

Older homes also have a way of turning a simple task into a research project. You pull up flooring and find water damage. You open a wall and find wiring that hasn’t been touched since 1938. You go to hang a door and realize nothing in the house is actually square anymore. Each of these detours costs time you didn’t budget for — often more time than the original project itself.

There’s also a quieter cost that doesn’t show up on any spreadsheet: the toll an extended project takes on a household. Dust sheets over furniture for two months, a bathroom out of commission longer than expected, a kitchen reduced to a hot plate and a cooler — these things add friction to daily life that’s hard to price but easy to feel. If your household includes small kids, pets, or someone working from home, that friction is worth weighing honestly alongside the dollar figures when you’re comparing 1930s house renovation ideas against your actual daily life.

Be honest with yourself about a few things before you commit: How many usable weekend hours do you actually have, once family, work, and rest are accounted for? Have you done this specific task before, or are you learning as you go? And how much do you value having your bathroom, kitchen, or living room back in working order versus stretched across months of half-finished work? None of these questions have a wrong answer, but they should factor into your decision as heavily as the material cost does.

1930s house renovation ideas

What a Pro Costs, and Why

Hiring out work on a 1930s house typically costs more per square foot than the same work on a newer home, and there’s a legitimate reason for that. Contractors who work on older homes in Louisiana are budgeting for uncertainty: plaster that crumbles differently than drywall, framing that’s true to old lumber dimensions instead of modern 2x4s, wiring and plumbing that may not meet current code and need updating as part of the job, and foundations that have shifted with our region’s clay soil and humidity over 90 years.

As a rough guide, floor refinishing by a professional crew often runs $3-8 per square foot depending on condition, bathroom remodels commonly land between $8,000 and $20,000 depending on finishes and how much of the plumbing and subfloor needs work, and full-room renovations that touch electrical, drywall, and finishes can range from $15,000 to $40,000-plus. These numbers vary a lot by scope, and they’re not meant to guilt anyone into hiring out — they’re meant to give you a realistic anchor point so the decision isn’t made in the dark.

It also helps to understand what’s included in a professional quote versus what often gets left out of a DIY budget. A contractor’s price typically bundles in disposal of old materials (a genuinely unpleasant and heavy job when you’re hauling out an old cast iron tub or a truckload of horsehair plaster), a warranty on the work performed, and the cost of carrying insurance that protects your home if something goes wrong mid-project. None of these show up as separate line items when you’re doing the work yourself, but they don’t disappear either — you’re just the one absorbing the risk instead of transferring it.

Timeline is another place professional pricing pays for itself. A crew of two or three experienced tradespeople can often complete in a week what takes a solo DIYer a month of weekends, simply because of the difference in hours available and the speed that comes from doing this work daily rather than occasionally. If your project involves the only bathroom or kitchen in the house, that compressed timeline alone can be worth the price difference.

What you’re paying for isn’t just labor hours. It’s the experience to recognize a structural issue before it becomes a bigger problem, the licensing and insurance that protect you if something goes wrong, and the speed that comes from having done this exact kind of job dozens of times. For anything involving old wiring, it’s also worth knowing that homes built before 1978 fall under lead-safe work practice rules for any renovation that disturbs painted surfaces — the EPA’s Renovation, Repair, and Painting Program lays out what’s required, and it applies whether you’re doing the work yourself or hiring it out.

1930s house renovation ideas

How to Decide: A Framework for 1930s House Renovation Ideas

Instead of a gut decision, run your specific project through these questions.

1. Is it cosmetic or structural? Painting, refinishing existing floors, updating hardware, and simple tiling are far more DIY-friendly than anything touching electrical panels, load-bearing walls, plumbing stacks, or foundations. For example, refinishing a hardwood floor or replacing a vanity is cosmetic — get it wrong and you’ve lost some time and material cost. Moving a wall to open a kitchen to a dining room, on the other hand, is structural, and getting it wrong can mean sagging floors or ceilings months later. If you’re not sure which category your project falls into, that uncertainty itself is a signal to at least get a professional opinion before you start.

2. What’s actually behind the wall? If you’ve already opened things up and know what you’re dealing with, DIY risk drops significantly. A homeowner who already replaced their water heater and knows their plumbing is copper, not galvanized, is working from a very different risk profile than someone about to open a wall for the first time since the house was built. If you haven’t opened anything yet and the house has never been renovated, budget extra time and money for surprises — 1930s houses in this region almost always have at least one.

3. Do you have the tools already, or are you buying them? If a project requires a one-time tool purchase you’ll never use again, that changes the math toward hiring out. But if you’re building a collection you’ll use across many projects — a good multi-tool set like the Milwaukee M12 FUEL 2-Tool Combo Kit or the budget-friendly RYOBI P1819 18V ONE+ 6-Tool Combo Kit — that cost gets spread across your whole renovation and future maintenance, making DIY more worthwhile long-term.

4. What’s your timeline pressure? If you have one working bathroom and it’s the one you’re renovating, hiring out to minimize downtime is often worth every dollar. If you have flexibility and no deadline, DIY becomes a lot more appealing since delays cost you inconvenience rather than real hardship. Consider, too, whether the project is reversible. Paint color and hardware are easy to redo if you don’t love the result. A poorly cut tile pattern or a mis-hung door is not, and that irreversibility should push borderline decisions toward hiring out.

5. What happens if the budget runs over? DIY projects on older homes have a well-earned reputation for costing more than the original estimate once hidden issues surface. Before you start, decide honestly whether you have a cushion — in both money and patience — if the project reveals more than expected. If the answer is no, that’s a strong argument for bringing in a professional who can spot likely surprises during an initial walkthrough, before money and materials are already committed.

If you’re weighing a specific piece of the project, our post on how to spot signs of old wiring in a 1930s home walks through what to look for before you commit to a DIY electrical project, and it’s worth a read regardless of which way you lean. We’ve also covered how to restore original woodwork and trim without stripping away the character that makes these houses special, which is one of the most DIY-friendly places to start if you’re new to renovating an older home.

A good rule of thumb: DIY the parts of the project where a mistake costs you time and a little money. Hire out the parts where a mistake costs you a code violation, a structural problem, or a safety hazard. For guidance on which is which, This Old House has decades of project breakdowns specific to older home renovation that are worth browsing before you commit either way.

1930s house renovation ideas

Getting a Quote, No Pressure

If you’ve run the numbers here and DIY still feels right for your project, go for it — that’s exactly what this blog is for, and we mean it. There’s real satisfaction in bringing a 1930s house back to life with your own hands, and plenty of the ideas above are genuinely achievable for a motivated homeowner with the right tools and a little patience.

But if you’ve gotten partway through this and realized the project is bigger, riskier, or more time-consuming than you expected, that’s a completely normal place to land too — it doesn’t mean you failed at anything. Whichever way you land, the worst outcome is decision paralysis — a half-planned project that sits unfinished because the scope kept growing in your head without ever being tested against real numbers. Use the framework above, get real quotes for comparison even if you think you’ll DIY, and make the call with information instead of guesswork.

If you’d like an honest second opinion on scope and cost before you start, or you’ve decided this one’s better left to people who do it every day, you can get a free quote from our team with no pressure attached. We work on older homes throughout Covington and Slidell regularly, and we’re happy to tell you honestly whether a project is a good DIY candidate or not, even if you end up doing it yourself. Good 1930s house renovation ideas are only as good as the honest cost math behind them, and now you’ve got a framework for running that math on your own project.

1930s house renovation ideas

Bathroom Remodel in Covington LA — What St. Tammany Parish Homeowners Need to Know

If you have been thinking about a bathroom remodel in Covington LA, you are not alone. Across St. Tammany Parish — from Mandeville to Slidell to Madisonville — homeowners are investing in their bathrooms more than any other room in the house. A well-executed bathroom remodel adds real value to your home, improves your daily quality of life, and when done right, lasts for decades without issue.

Bathroom gut renovation in progress — full demolition by Barger Home Improvements serving Covington and St. Tammany Parish Louisiana

But most homeowners in St. Tammany Parish make at least one costly mistake before the first tile is ever laid — and it almost always comes down to not knowing what to expect before the project starts. This guide covers everything you need to know: what a bathroom remodel in Covington LA actually costs, what the process looks like, what questions to ask your contractor, and how to make sure you get the result you actually want.

Barger Home Improvements has completed bathroom remodels across Covington, Mandeville, and Slidell. Here is what we have learned from doing this work in St. Tammany Parish homes specifically.

→ REQUEST A FREE ESTIMATE


What Does a Bathroom Remodel in Covington LA Actually Cost?

The most common question we hear from St. Tammany Parish homeowners is straightforward: what is this going to cost me? The honest answer is that bathroom remodel costs in Covington LA vary significantly depending on the scope of work — but here is a realistic breakdown for this market.

Budget Bathroom Remodel — $5,000 to $8,000

A budget remodel in the Covington and Mandeville area typically covers cosmetic updates without moving plumbing or changing the footprint of the space. This includes a new vanity and fixtures, updated lighting, fresh tile on the floor or in the shower, and a paint refresh. This is the right scope for a bathroom that functions well but needs a visual update.

Mid-Range Bathroom Remodel — $8,000 to $12,000

A mid-range bathroom remodel in St. Tammany Parish covers a more comprehensive transformation — full tile work on floors and shower walls, a new shower enclosure or tub-to-shower conversion, updated vanity with custom or semi-custom cabinetry, new fixtures throughout, and improved lighting. This is the most common scope we complete for Northshore homeowners.

Full Bathroom Renovation — $12,000 to $15,000+

A full bathroom renovation involves gut work — removing everything down to the studs, addressing any underlying issues with plumbing or waterproofing, and rebuilding the space completely. If you are expanding the footprint, adding an accessibility feature, or completely reimagining the layout, this is the scope you are looking at. For custom tile work, higher-end fixtures, and full custom cabinetry, costs can extend beyond $15,000 depending on materials selected.

Important note for St. Tammany Parish homeowners:

Louisiana’s humidity and moisture levels mean that waterproofing is not optional — it is the most critical part of any bathroom remodel. Cutting corners on waterproofing behind tile or around the shower enclosure leads to mold, structural damage, and costly repairs within a few years. Barger Home Improvements never shortcuts this step.

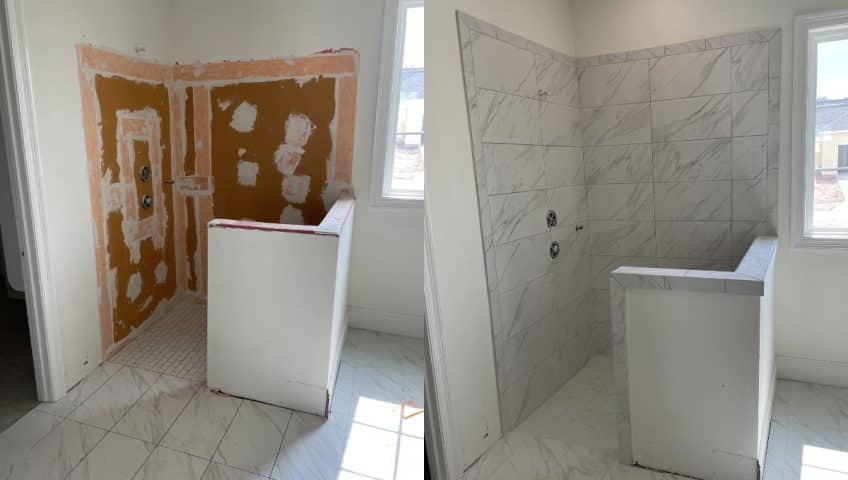
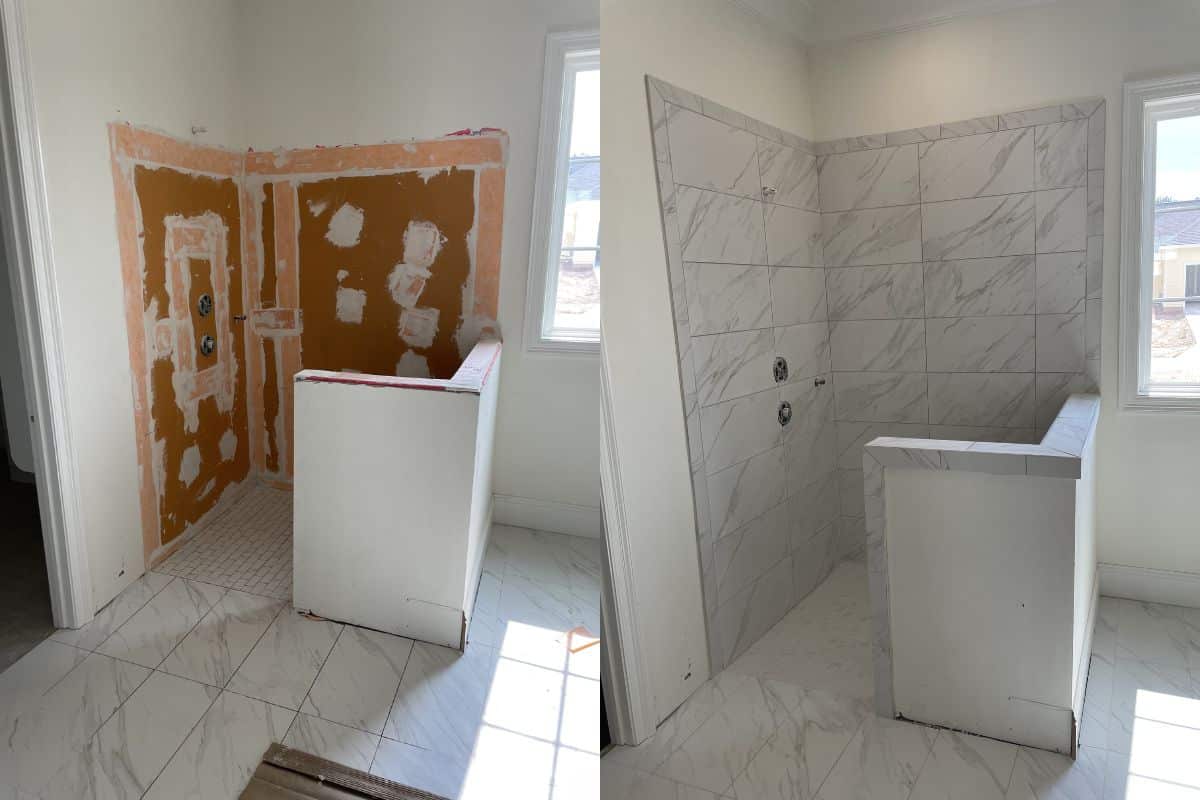
Bathroom tile installation before and after — large format shower tile by Barger Home Improvements in St. Tammany Parish Louisiana


Bathroom Remodel Services Barger Home Improvements Offers in Covington and St. Tammany Parish

Barger Home Improvements handles every phase of a bathroom remodel in Covington LA — from the initial demo to the final fixture installation. Here is what we offer Northshore homeowners.

Full Gut Bathroom Renovations

Complete demolition and rebuild from the studs out. We handle the demo, moisture barrier installation, new plumbing rough-in if needed, backer board, tile, fixtures, vanity, cabinetry, lighting, and final trim work. One contractor, one point of contact, start to finish.

Tile Work — Floors and Shower Walls

Tile installation is one of the most visible elements of any bathroom remodel and one of the areas where craftsmanship shows most clearly. Barger Home Improvements installs floor tile, shower wall tile, and decorative accent tile throughout Covington, Mandeville, and Slidell. We work with porcelain, ceramic, natural stone, and large-format tile.

Tub-to-Shower Conversions

One of the most requested projects we complete across St. Tammany Parish. If you have a tub you never use taking up space in your primary bathroom, converting it to a walk-in shower increases both the functionality and the value of the space. We handle the full conversion including plumbing reconfiguration, waterproofing, tile, and custom glass enclosure coordination.

Vanity and Fixture Replacement

A new vanity, updated fixtures, and improved lighting can transform the feel of a bathroom without a full gut renovation. If your bathroom’s bones are solid but it feels dated, this is often the most cost-effective path to a refreshed space.

Custom Built-Ins and Storage

Bathroom storage is one of the most overlooked elements of a remodel. Barger Home Improvements designs and builds custom storage solutions — recessed niches, built-in shelving, linen cabinets, and vanity towers — that make the space more functional and eliminate the clutter that makes even a nice bathroom feel chaotic.

Accessibility Modifications and Aging-in-Place Upgrades

For St. Tammany Parish homeowners looking to make their bathroom safer and more accessible — walk-in showers with zero-threshold entry, grab bar installation, comfort-height toilets, and wider doorways — Barger Home Improvements provides aging-in-place bathroom modifications that are both functional and beautiful.

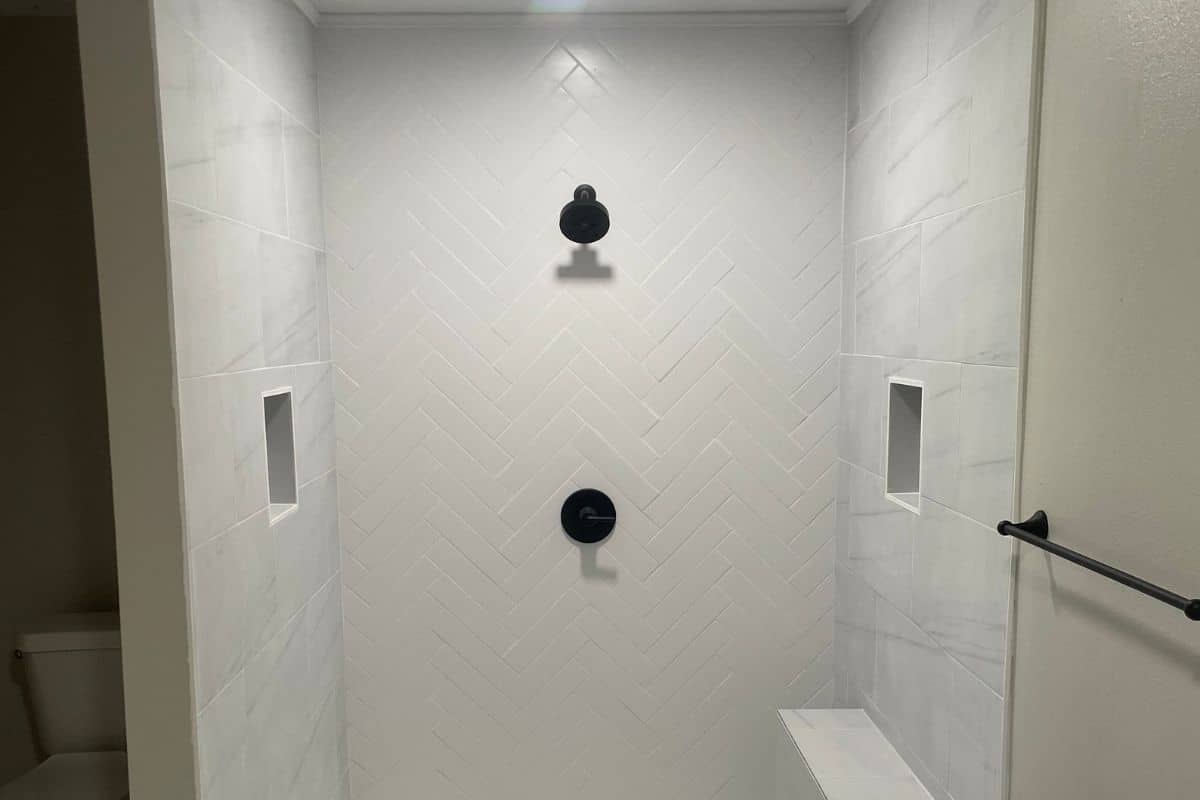
Custom tile shower with matte black fixtures and recessed niche — bathroom remodel in Covington Louisiana by Barger Home Improvements

→ SEE OUR WORK AND REQUEST A FREE ESTIMATE


The Bathroom Remodel Process in St. Tammany Parish — What to Expect

One of the biggest sources of frustration for homeowners during a bathroom remodel is not the work itself — it is not knowing what is happening and when. Here is exactly what the process looks like when you work with Barger Home Improvements on a bathroom remodel in Covington LA or anywhere across St. Tammany Parish.

Step 1 — Free In-Home Estimate

Brent comes to your home, walks the space, listens to what you want, and gives you a clear, honest estimate. No pressure, no vague numbers. You will know exactly what the project covers and what it costs before any commitment is made.

Step 2 — Material Selection

Once you decide to move forward, we help you select tile, fixtures, vanity, and finishes. For homeowners who want guidance, Brent can walk you through what works well in St. Tammany Parish homes specifically — what holds up to the humidity, what styles photograph well, and what adds the most value at resale.

Step 3 — Demo and Prep

Demo day is the most disruptive part of the process and typically the fastest. Depending on the scope, demo takes one to two days. We protect the surrounding areas of your home, remove all debris, and prepare the space for the build phase. Any underlying issues — moisture damage, outdated plumbing, inadequate waterproofing — are identified and addressed at this stage before they become bigger problems.

Step 4 — The Build

Waterproofing, backer board, plumbing rough-in if needed, tile installation, vanity and fixture installation, lighting, trim work, and final touches. Timeline depends on scope — a cosmetic refresh takes three to five days, a full gut renovation typically runs two to three weeks depending on materials and custom elements.

Step 5 — Final Walkthrough

Before we consider the job complete, Brent does a final walkthrough with you. Every grout line, every fixture, every piece of trim gets checked. If anything is not right, we fix it before we leave. This is not a common step in contractor culture on the Northshore — it is standard practice for Barger Home Improvements.

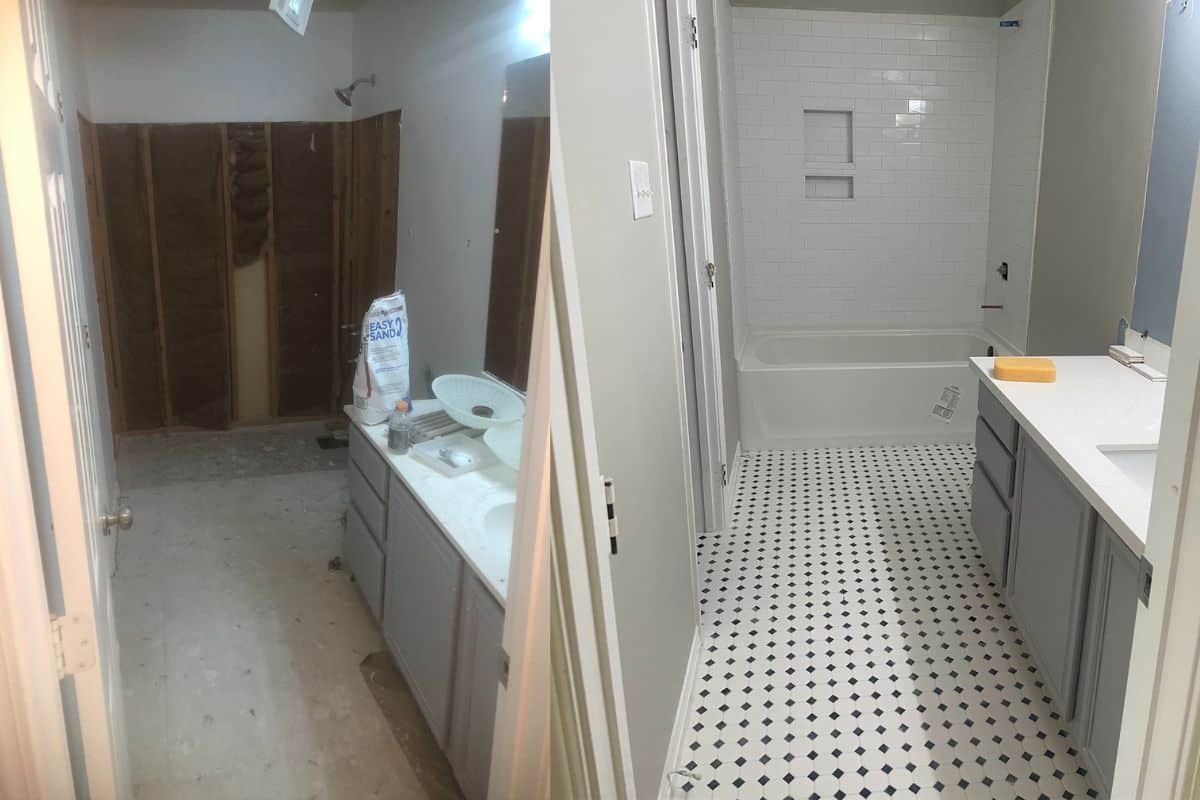
Bathroom remodel with black and white mosaic floor tile and custom vanity — St. Tammany Parish bathroom renovation by Barger Home Improvements


What to Look for in a Bathroom Remodel Contractor in Covington LA

St. Tammany Parish homeowners have no shortage of contractors to choose from — but not all bathroom remodel contractors operate the same way. Here is what actually matters when you are evaluating who to hire for a bathroom remodel in Covington LA.

Check Their Google Reviews

Google reviews from actual homeowners in your area are the most reliable indicator of what it is like to work with a contractor day to day. Look for consistent feedback about communication, cleanliness, timeline, and quality of finish work — not just the final result.

Get the Scope in Writing

A verbal estimate is not a contract. Before any work begins, you should have a written scope of work that details exactly what is included, what materials will be used, what the payment schedule looks like, and what happens if something unexpected comes up during demo. Barger Home Improvements provides written estimates on every project.

Ask About Their Waterproofing Process

In Louisiana’s climate, a bathroom remodel contractor who cannot clearly explain their waterproofing process is a contractor who will create problems for you within a few years. Ask specifically what product they use behind tile and how they handle the transition between the shower pan and the walls. The answer tells you everything about how they approach quality.


Bathroom Remodel in Covington LA — Frequently Asked Questions

How long does a bathroom remodel take in Covington LA?

A cosmetic update with new tile, vanity, and fixtures typically runs one to two weeks. A full gut renovation runs two to four weeks depending on scope and whether any unexpected issues come up during demo. Custom elements like specialty tile or custom cabinetry can extend the timeline — we build that into the estimate upfront so there are no surprises.

Do I need a permit for a bathroom remodel in Covington LA?

It depends on the scope. Cosmetic work — replacing fixtures, flooring, and vanities without moving plumbing — typically does not require a permit in St. Tammany Parish. Any work that involves moving plumbing, adding electrical circuits, or changing the footprint of the space requires a permit. Barger Home Improvements handles the permit process for projects that require it.

What is the best tile for a bathroom in Louisiana?

Porcelain tile is the most practical choice for Louisiana bathrooms — it is dense, moisture-resistant, and holds up to the humidity levels on the Northshore better than ceramic or natural stone in most applications. Large-format porcelain tile is particularly popular right now and photographs extremely well. For shower floors, a smaller format tile with more grout lines provides better traction.

How much does a tub-to-shower conversion cost in Covington LA?

A tub-to-shower conversion in the Covington and Mandeville area typically runs between $4,000 and $8,000 depending on the size of the space, the tile selected, and whether plumbing needs to be reconfigured. If you are adding a custom glass enclosure, budget toward the higher end of that range.

Does a bathroom remodel add value to a home in St. Tammany Parish?

Yes — consistently. A well-executed bathroom remodel in Covington LA typically returns 60 to 70 percent of the project cost in added home value, and in a competitive Northshore market a dated primary bathroom can actively hurt your list price. More importantly, an updated bathroom improves your daily experience in your home for years before you ever think about selling.


Ready to Start Your Bathroom Remodel in Covington LA?

Barger Home Improvements serves Covington, Mandeville, Slidell, and communities throughout St. Tammany Parish. Whether you are planning a cosmetic refresh or a complete bathroom renovation, Brent brings the same level of craftsmanship and attention to detail to every project — regardless of size.

Free estimates are available for all bathroom remodel projects across St. Tammany Parish. Reach out today and let’s talk about what your bathroom could look like.

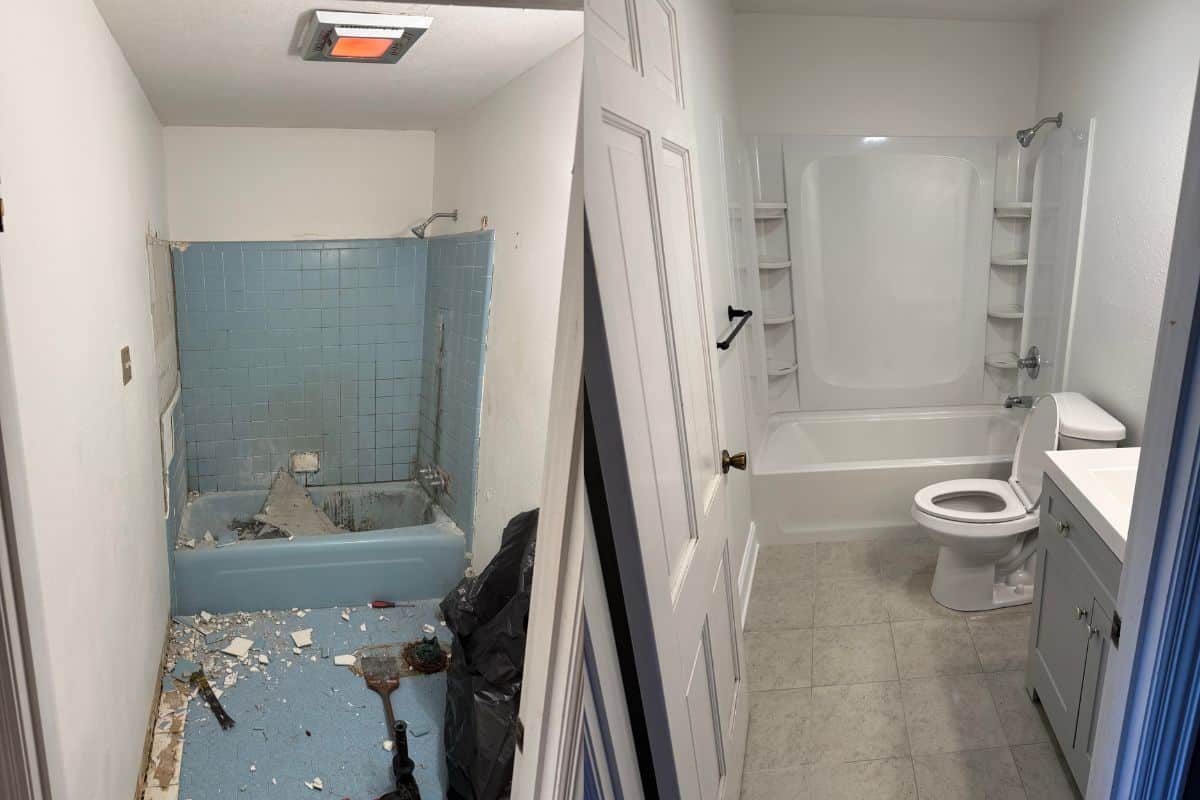
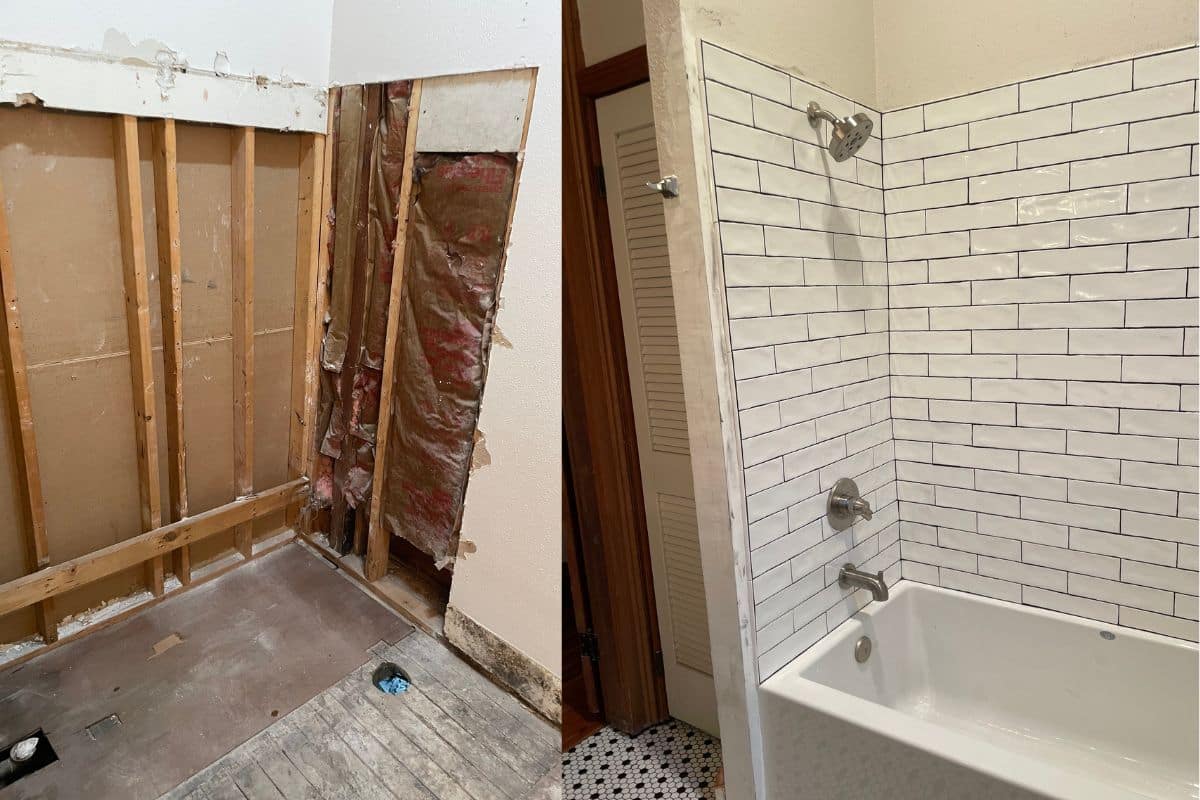
Bathroom remodel before and after — subway tile tub surround installation by Barger Home Improvements in Covington Louisiana

→ REQUEST YOUR FREE ESTIMATE AT BARGERHOMEIMPROVEMENTS.COM

Barger Home Improvements

Serving Covington, Mandeville, Slidell, and St. Tammany Parish

Licensed • Local • Trusted