If you’ve spent any time under your house in south Louisiana, you already know the drill: musty air, damp dirt or crumbling old plastic sheeting, maybe a little standing water after a hard rain. Before you start dreaming up crawl space renovation ideas that make the space more useful, it helps to know which upgrades actually matter here on the north shore versus what works in a drier climate. Our humidity, high water table, and hurricane season change the whole equation. This guide walks through what to prioritize, what’s worth the money, and where a project like this can go sideways if you skip a step.
We say this a lot, but it bears repeating up front: a crawl space in Covington or Slidell is not the same animal as a crawl space in Colorado or Ohio. Ours sits closer to the water table, deals with more rainfall, and spends most of the year in near-constant humidity. That means the crawl space renovation ideas that work great in a Pinterest photo from a dry climate can actually cause problems here if you copy them without adjusting for our conditions. Keep that in mind as you read through each idea below — we’ve tried to flag where the local climate changes the calculus.
What to Look For Before You Try Any Crawl Space Renovation Ideas
Every good crawl space renovation idea starts with the same question: is the space dry and structurally sound? It doesn’t matter how nice your new storage shelving or vapor barrier looks if moisture is still working its way in through the soil, foundation vents, or a cracked pier. In our climate, that’s rarely a maybe — it’s almost always happening to some degree. So before you shop for materials or plan out a layout, walk your crawl space with a flashlight and check for:
– Standing water or damp soil, especially near the low corners
– Wood rot or soft spots on joists and sill plates
– Visible mold, mildew, or that unmistakable musty smell upstairs
– Sagging or torn vapor barrier (or none at all)
– Rusted metal fasteners or ductwork, a sign of chronic humidity
– Gaps around pipe penetrations, vents, or the crawl space door
Take your time on this walkthrough — it’s genuinely the most important hour you’ll spend on the whole project. Bring a notepad or your phone and photograph anything that concerns you, section by section, so you’re not relying on memory later when you’re deciding what to fix first. It also helps to check after a heavy rain rather than during a dry stretch, since a lot of moisture issues only show themselves when the ground is saturated. If you find active water intrusion or rot in the framing, that needs to be solved first — no renovation idea is worth building on top of a moisture problem. The EPA has a solid, practical guide to mold, moisture, and your home that’s worth a read before you buy a single piece of material, since a lot of these fixes overlap with mold prevention.
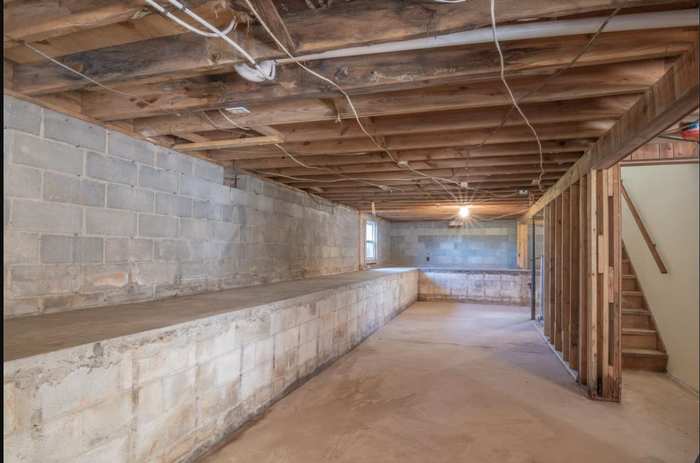
Idea #1: Full Encapsulation (The Foundation of Everything Else)
Encapsulation means sealing the crawl space off from outside air and ground moisture with a heavy-duty vapor barrier (typically 10-20 mil poly sheeting) that covers the soil and runs up the foundation walls, combined with sealed vents and sometimes conditioned air. For homes in Covington and Slidell, this is usually the single most valuable upgrade you can make, full stop. It protects your subfloor, your ductwork, your indoor air quality, and it’s the prerequisite for basically every other crawl space renovation idea on this list.
The actual process breaks down into a handful of stages: clearing out old debris and any existing torn plastic, addressing any active moisture sources (grading, gutters, or a French drain if water is actively pooling), laying and seaming the vapor barrier so it overlaps properly at every seam, taping it, running it up the foundation walls a few inches, and sealing foundation vents so outside humid air can’t undo all that work. Some homeowners stop there; others add a dedicated supply of conditioned air from the HVAC system, which is a bigger step and usually worth having an HVAC contractor weigh in on.
DIY encapsulation is doable for a motivated homeowner with a free weekend (or two), but it’s physically miserable work — you’re on your belly in tight, dusty spaces taping seams and stapling barrier material, often in July heat that makes an already claustrophobic job feel worse. Wear a respirator rated for dust and mold spores, not just a paper mask, and bring a headlamp so both hands stay free. A drill/driver combo makes fastening trim boards and vent covers much faster than doing it by hand; something like the DEWALT 20V MAX Cordless Drill and Impact Driver Combo Kit handles both the drilling and driving you’ll need without swapping tools mid-crawl. Budget more time than you think — most first-timers underestimate how long seam-taping alone takes, especially around pipes, ductwork, and support piers that break up an otherwise simple rectangle of floor space.

Idea #2: A Dedicated Crawl Space Dehumidifier
Once the space is sealed, humidity has nowhere to escape unless you actively manage it. This is the step people skip and then wonder why their encapsulation “didn’t work.” A crawl space needs its own dehumidifier sized for the square footage — not a little portable unit meant for a bedroom. The ALORAIR Galaxy 60 Crawl Space Dehumidifier 145 PPD, Up to 1,800 Sq. Ft. is built specifically for this kind of low-clearance, high-moisture environment, with automatic drainage so you’re not hauling a bucket out every few days. In our climate, running one of these year-round isn’t overkill — it’s basically mandatory if you want the space to stay dry.
When you’re sizing and placing the unit, think about airflow the same way you would for a room upstairs. Set it up near the center of the space if possible, away from the direct path of the sump pump discharge line, and route the condensate drain to daylight or into an existing drain line rather than letting it pool nearby. Most units have a humidistat you can set and mostly forget — aim to keep relative humidity in the 50-55% range, which is low enough to stop mold and wood rot without drying out framing unnecessarily. Check the filter every couple of months; in a dusty, freshly renovated crawl space, it’ll clog faster than the manual suggests.
Worth noting: during hurricane season, power outages are common, and a dehumidifier that shuts off for three days during a tropical storm can undo weeks of progress, especially if that outage coincides with heavy rain and a saturated water table pushing moisture toward your foundation. A backup power source like the Generac 8011 GP7500E 7,500-Watt Dual-Fuel Portable Generator can keep a dehumidifier (and a sump pump, if you have one) running through an outage, which matters more here than in almost any other part of the country. It’s the kind of purchase that feels like overkill until the one August you’re glad you have it.

Idea #3: Smarter Insulation for Our Climate
Traditional fiberglass batts stapled between the joists are a common sight in older homes, but they’re actually one of the worst options for humid climates — they trap moisture against the wood and become a breeding ground for mold, and they tend to sag and fall over time as the paper facing degrades. If you’re updating insulation as part of your crawl space renovation ideas, rigid foam board against the foundation walls (paired with encapsulation) performs far better than batts against the subfloor. It’s a bigger shift in approach than most homeowners expect, but it’s the difference between insulation that lasts and insulation you’re replacing again in five years.
The logic here is worth understanding, not just following blindly: once you’ve encapsulated and conditioned the crawl space air, you’re treating the space more like a sealed basement than a vented attic. Insulating the perimeter walls instead of the subfloor keeps the whole crawl space — including your ductwork and any plumbing down there — inside the home’s conditioned envelope. That’s a meaningfully different approach than what a lot of national how-to articles recommend, because most of them are written for climates where vented crawl spaces still make sense. Ours generally don’t.
Idea #4: Smart, Off-the-Ground Storage
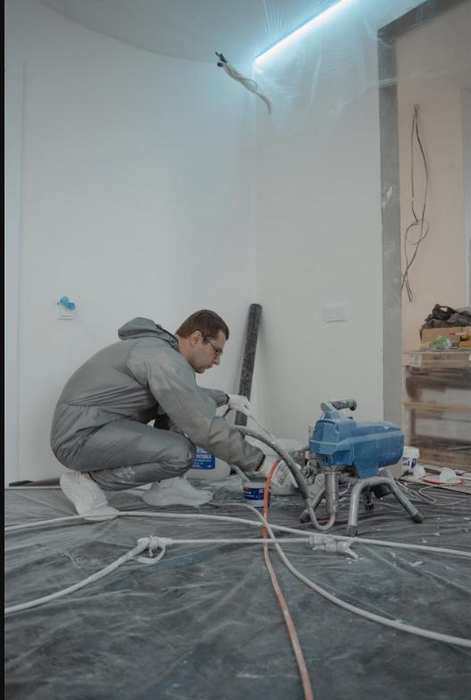
Once the space is dry and sealed, a crawl space can genuinely earn its keep as storage — holiday decorations, off-season gear, extra building materials. The key rule: nothing touches the vapor barrier or sits directly on the ground, even a sealed one. Freestanding wire shelving units or wall-mounted brackets keep bins up off the floor and away from any residual dampness. Stick to plastic totes rather than cardboard boxes, since cardboard wicks moisture even in a well-controlled space.
A few extra habits go a long way here too. Label totes clearly and keep a simple inventory list taped inside the access door, since crawl space storage tends to become out-of-sight, out-of-mind otherwise. Avoid storing anything you’d be genuinely upset to lose — even a well-encapsulated crawl space is still more exposed to temperature swings, pests, and the occasional plumbing leak than an interior closet. Think seasonal decorations and bulky, replaceable items rather than family photos or important documents.
Idea #5: Lighting and Easier Access
If you’re going to be down there regularly — checking the dehumidifier, grabbing storage bins, doing seasonal HVAC maintenance — a couple of battery-powered or hardwired LED puck lights and a properly sized access door make a bigger quality-of-life difference than people expect. A wider, insulated crawl space door also helps keep conditioned air where it belongs if you’ve gone the encapsulation route. This is a nice weekend add-on once the bigger structural and moisture work is done.
If you’re running any wiring down there for lighting, treat it with the same caution you would in a damp basement — use fixtures and connectors rated for damp locations, and if you’re not fully comfortable running low-voltage wiring yourself, this is an easy task to hand off to an electrician for an hour rather than risk a bad connection in a space you’ll rarely be checking on. The Consumer Product Safety Commission and most local codes are strict about damp-location fixtures for good reason.
Idea #6: Reinforcing Framing and Support Piers
While you’re already under there, it’s worth inspecting and, if needed, sistering (reinforcing) any joists that show early signs of sagging or rot, and checking that support piers are level and properly shimmed. This isn’t the most exciting item on a list of crawl space renovation ideas, but catching a minor structural issue now is a lot cheaper than dealing with a sagging floor upstairs later. A full-size tool combo kit like the CRAFTSMAN V20 7-Tool Combo Kit (CMCK700D2) covers the drilling, cutting, and fastening you’d need for this kind of framing work without buying tools piecemeal.
When you’re checking piers, bring a 4-foot level and a flashlight, and look for gaps between the pier cap and the beam it’s supporting — even a small gap means the pier isn’t doing its job and the load is shifting elsewhere. Minor shimming with hardwood shims or pressure-treated cedar shingles is a reasonable DIY fix. If you’re seeing piers that have visibly sunk, tilted, or cracked, or joists with rot beyond surface staining, that’s a sign the issue has been developing for a while and it’s worth having someone experienced confirm the scope before you sister anything yourself.
What Doesn’t Make Sense Here: Turning It Into Living Space
You’ll see plenty of crawl space renovation ideas online about converting the space into a mini rec room or extra storage “basement.” In most of Covington and Slidell, that’s not realistic — our crawl spaces are typically 18 to 36 inches of clearance, built that way specifically because of our high water table and flood risk. Digging out a crawl space to create headroom, the way people do up north to build basements, isn’t something to take on as a DIY project; it involves foundation engineering, drainage, and permitting that’s well outside weekend-project territory. If you’re set on more usable square footage, that conversation is better had with a contractor who can evaluate your specific foundation and site — our team can walk you through what’s realistic during a free quote if you want an honest read on it.
Our Honest Take
If we’re being straight with you: encapsulation plus a proper dehumidifier is the crawl space renovation idea that matters most in this region, and it’s not close. Everything else on this list — storage, lighting, insulation upgrades — only holds up long-term once moisture is under control. We’ve seen too many homeowners spend money on nice shelving or fresh insulation only to have it ruined within a year because the underlying humidity problem was never addressed. Start there, and everything else becomes a much easier, more satisfying project. For more on the sealing process itself, the step-by-step guide to encapsulating your crawl space on our blog covers the materials and technique in more detail, and Family Handyman’s overview of crawl space moisture control is a good second opinion on the approach.
If you’re trying to prioritize on a budget, tackle it in this order: fix any active water intrusion first, then encapsulate, then add the dehumidifier, then move on to insulation, storage, and lighting as time and money allow. Doing it in reverse — buying nice shelving before the moisture problem is solved, for instance — is the single most common mistake we see, and it’s an expensive one to unwind.
When to Bring in a Pro
DIY crawl space work is genuinely doable for sealing, insulating, and organizing — but if you’re finding active rot in structural framing, standing water that returns after every rain, or piers that aren’t level, that’s a sign the problem is bigger than surface moisture. That’s the point where it makes sense to have someone experienced take a look before you build anything on top of it. If you’d rather skip the crawling around altogether, or just want a second opinion on what you’re seeing down there, our contact page is the easiest way to get in touch and have someone walk the space with you.
Either way, a little planning before you start goes a long way. Get the moisture problem handled first, keep it monitored, and the rest of your crawl space renovation ideas — storage, lighting, insulation, all of it — will actually stick around to be enjoyed instead of redone in a year or two.